3D Printer Nozzle Sizes: Which One Should You Use?
Your nozzle size determines how fast you print and how much detail you get. This guide explains every common size, when to use each one, and why most beginners should stick with 0.4mm until they have a specific reason to change.
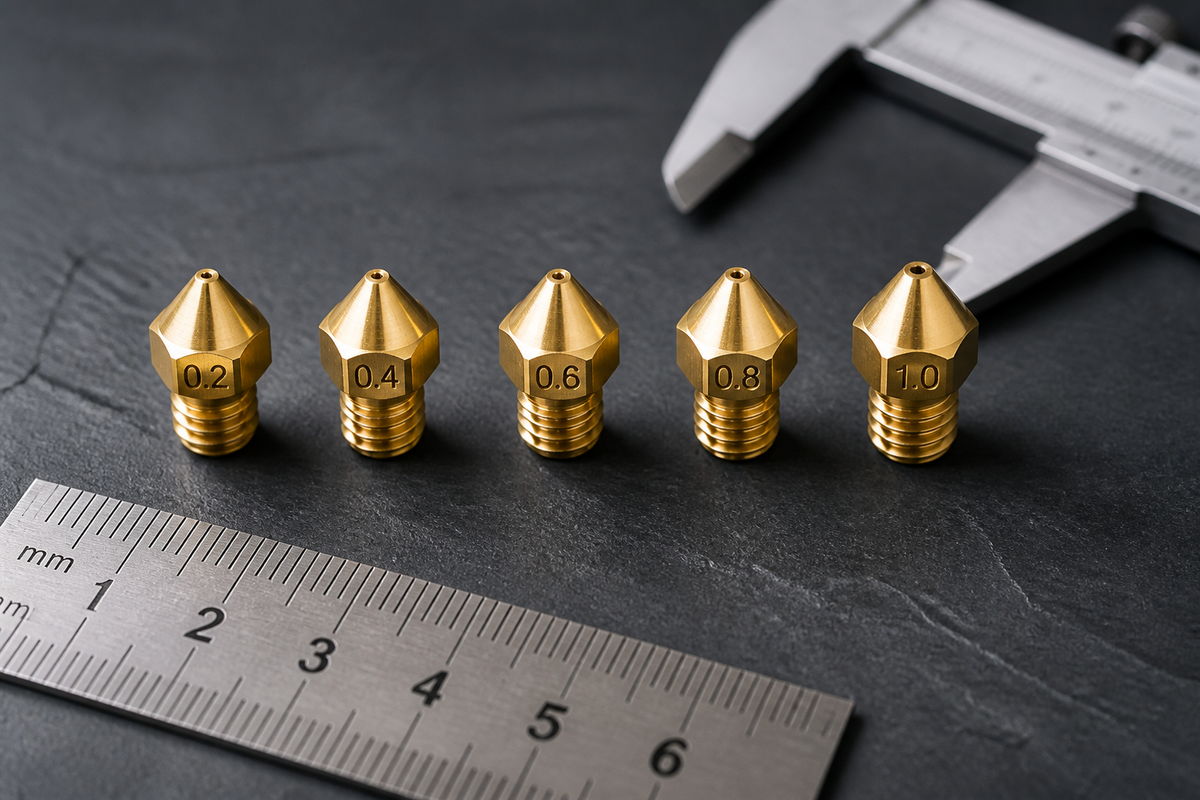
Every FDM 3D printer has a nozzle at the tip of its hotend. Filament melts inside, then gets pushed out through this tiny hole onto your build plate. The diameter of that hole, the nozzle size, determines two things: how much detail your prints have, and how fast they finish.
The good news: the 0.4mm nozzle that came with your printer handles 90% of what you'll ever want to print. You don't need to rush out and buy alternatives. But understanding 3D printer nozzle sizes helps you make better decisions when you do want more detail or faster prints.
What Does Nozzle Size Actually Change?
Think of it like drawing tools. A fine-tip pen (0.2mm nozzle) draws thin, precise lines but takes forever to fill a large area. A thick marker (0.8mm nozzle) fills space quickly but can't do fine details.
Your 3D printer nozzle diameter works the same way. A smaller hole produces thinner lines of plastic, meaning finer details and smoother surfaces, but each layer covers less area per pass, so prints take longer. A larger hole produces wider lines, prints fill up faster, but small features blur together.
The nozzle also sets limits on your layer height (how thick each horizontal slice is). You can't print layers taller than about 75% of your nozzle diameter, and going below 25% creates adhesion problems. This relationship between nozzle size and layer height is what determines your print's final appearance.
Standard 3D Printer Nozzle Size: Why 0.4mm Is the Default
The standard 3D printer nozzle size across the industry is 0.4mm. Your Ender 3 nozzle size is 0.4mm. Bambu Lab A1, P1S, and X1C all ship with 0.4mm. Prusa MK4: 0.4mm. It's the universal default for good reason.
At 0.4mm, you get:
- Fine enough detail for most models (miniatures look good, text is readable, curves are smooth)
- Fast enough speed for practical use (a typical model takes 2-4 hours, not 12)
- Wide enough reliability (less prone to clogging than smaller nozzles)
- Universal compatibility (every slicer profile, every tutorial, every troubleshooting guide assumes 0.4mm)
A 0.4mm nozzle 3D printer paired with 0.2mm layer height is the "standard quality" setting that balances everything. It's the baseline other sizes are compared against.
Nozzle Size Chart: All Common Sizes at a Glance
Here's your nozzle size guide for quick reference:
| Nozzle Size | Line Width | Layer Height Range | Best For | Print Speed |
|---|---|---|---|---|
| 0.2mm | 0.2-0.24mm | 0.05-0.15mm | Miniatures, jewelry, ultra-fine detail | Very slow (3-5x longer) |
| 0.3mm | 0.3-0.36mm | 0.08-0.2mm | Detailed display models | Slow (1.5-2x longer) |
| 0.4mm | 0.4-0.48mm | 0.1-0.3mm | Everything (universal default) | Standard baseline |
| 0.6mm | 0.6-0.72mm | 0.15-0.4mm | Fast functional parts, large models | Fast (40-60% quicker) |
| 0.8mm | 0.8-0.96mm | 0.2-0.6mm | Vases, structural parts, rapid prototypes | Very fast (2-3x quicker) |
| 1.0mm | 1.0-1.2mm | 0.25-0.75mm | Maximum speed prints, rough prototypes | Fastest (3-4x quicker) |
The 3D printer nozzle dimensions you'll realistically use as a beginner: 0.4mm for daily printing, maybe 0.6mm when you want speed. Everything else is situational.
0.4 vs 0.6 Nozzle: The Most Common Upgrade Decision
This is the comparison most people actually face. You've been printing with 0.4mm for a while. Should you try 0.6mm?
What 0.6mm gives you:
- 40-60% faster print times (wider lines = fewer passes per layer)
- Stronger parts (wider extrusion lines bond to each other over more surface area)
- Less stringing on some materials (larger orifice = more consistent flow)
- Better for large functional parts where speed matters more than surface finish
What you give up:
- Fine details blur slightly (text below ~8pt becomes hard to read)
- Visible layer lines are wider (cosmetically rougher at same layer height)
- Minimum printable feature size increases (thin walls below 0.6mm become impossible)
Quick decision:
- Printing display models, miniatures, or anything cosmetic? Stay at 0.4mm
- Printing brackets, tools, cases, or anything functional? Try 0.6mm
- Printing large models that take 10+ hours at 0.4mm? 0.6mm cuts that to 5-6 hours
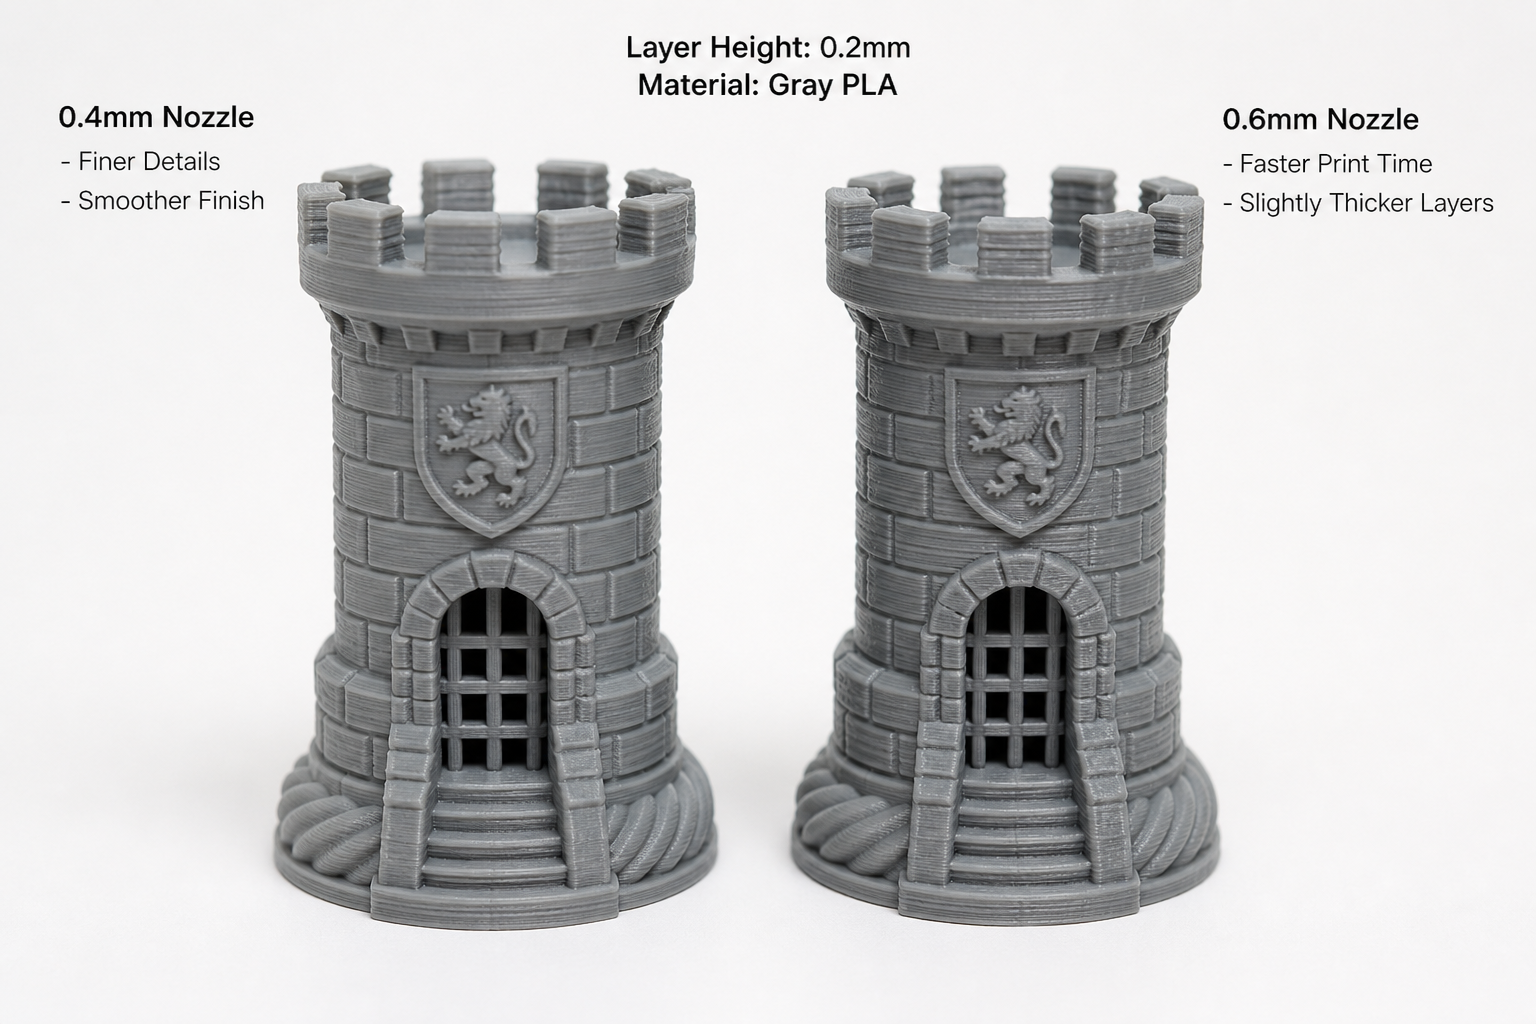
The .4 vs .6 nozzle choice isn't permanent. You can swap between them based on the project. Many users keep both installed on different printers, or swap before starting a new project type.
Nozzle Size and Layer Heig
Nozzle Size and Layer Height: The Simple Rule
The relationship between nozzle size and layer height follows one rule:
Layer height should be 25% to 75% of nozzle diameter.
For a 0.4mm nozzle:
- Minimum practical layer height: 0.1mm (fine detail, slow)
- Standard layer height: 0.2mm (balanced)
- Maximum layer height: 0.3mm (fast, rougher)
The smallest layer height for a .4 nozzle is technically 0.05mm on high-precision machines, but below 0.1mm you'll fight adhesion issues and gain minimal visible improvement. 0.12mm is the realistic "fine" setting for most printers.
Why the 75% maximum? When a layer is taller than 75% of nozzle width, the extruded line becomes too round and doesn't squish flat enough to bond properly to the layer below. You get weak, delaminating prints.
Why the 25% minimum? Extremely thin layers mean the nozzle drags very close to the previous layer. Friction increases, flow consistency drops, and tiny errors in bed leveling become amplified.
What Nozzle Size for Miniatures and Fine Detail?
If you're printing tabletop miniatures (D&D figures, Warhammer models) or jewelry prototypes, what nozzle size for 3D printer detail work?
0.2mm nozzle gives the absolute finest FDM results. Layer lines nearly disappear at 0.05-0.08mm layer height. Facial features, armor textures, and small text come through clearly.
The tradeoffs are real though:
- Print time increases 3-5x compared to 0.4mm
- Clogging risk is much higher (tiny particles in filament can block the nozzle)
- Requires slower print speeds (30-50 mm/s vs 100-200+ mm/s)
- Retraction tuning becomes more critical
0.3mm is a good compromise: noticeably more detail than 0.4mm, but without the extreme slowness and clogging risk of 0.2mm.
Honest advice: If ultra-fine miniatures are your main goal, resin printing produces better results than any FDM nozzle size. But if you want decent miniatures from your existing FDM printer without buying a second machine, 0.25-0.3mm nozzle with 0.1mm layer height delivers surprisingly good results.
Bambu Lab Nozzle System: Quick-Swap Without Tools
Bambu Lab printers use a proprietary quick-swap nozzle system that's worth mentioning because it changes the calculus of nozzle switching.
Traditional nozzle change (Ender 3, Prusa, most printers):
- Heat hotend to 250°C
- Use wrench to unscrew old nozzle (risk of burns)
- Screw in new nozzle while hot
- Re-level bed and re-calibrate Z offset
- Total time: 10-15 minutes
Bambu Lab nozzle change:
- Remove nozzle (cold, no tools, twist-and-pull)
- Insert new nozzle (click)
- Printer auto-calibrates
- Total time: 30 seconds
Available sizes: 0.2mm, 0.4mm, 0.6mm, 0.8mm in both standard brass and hardened steel (for abrasive filaments like carbon fiber and wood-fill).
This quick-swap design means you can realistically keep a 0.4mm and 0.6mm on hand and switch between projects without it being a chore. On traditional printers, most people pick one size and leave it.
When You Don't Need to Change Your Nozzle
Before you order a nozzle set, ask yourself: do I actually have a problem that a different nozzle solves?
You probably don't need to change if:
- Your prints look good to you at 0.4mm
- You mainly print practical items (phone stands, hooks, boxes, organizers)
- You haven't yet dialed in your temperature, retraction, and speed settings
- You've printed fewer than 10 spools total (still learning the basics)
You might benefit from changing if:
- You specifically need finer detail than 0.4mm can produce (miniatures, jewelry)
- Your prints consistently take 10+ hours and you want to cut that in half (go 0.6mm)
- You're printing with abrasive filament (carbon fiber, glow-in-dark) and your brass nozzle is worn out (switch to hardened steel, same size)
- You want vase-mode prints with thick, strong walls (0.8mm or 1.0mm)
The most common beginner mistake is blaming the nozzle for problems that are actually caused by temperature, bed adhesion, or moisture. Fix those first. If prints still aren't meeting your expectations after calibration, then consider a nozzle change.
FAQ
What size nozzle should I use for a 3D printer?
0.4mm for general use. It's the standard that comes with virtually every printer and handles everything from functional parts to display models. Only change to 0.2-0.3mm if you need extremely fine detail (miniatures), or to 0.6-0.8mm if you prioritize speed over surface finish.
Can you use 1.75mm filament in a 0.4mm nozzle?
Yes, that's the standard combination. The 1.75mm refers to the filament diameter before it enters the hotend. Inside the hotend, the filament melts and gets squeezed through the 0.4mm nozzle opening. Think of it like toothpaste (1.75mm tube) being pushed through a small nozzle tip (0.4mm). The two numbers describe different parts of the system, not a compatibility issue.
Is .6 or .4 nozzle better?
Neither is universally better. 0.4mm gives finer detail and is the universal default (all tutorials and profiles assume it). 0.6mm prints 40-60% faster with stronger layer bonds, ideal for functional parts and large models. If you only own one nozzle, keep 0.4mm. If you can swap easily, use 0.4mm for display pieces and 0.6mm for functional or large prints.
How small can I print with a .4 nozzle?
The smallest reliable layer height is 0.1mm (100 microns). The smallest printable feature (wall thickness, text, details) is roughly 0.4-0.5mm. Details smaller than one nozzle width won't reproduce cleanly. For features below 0.3mm, you need a smaller nozzle (0.2mm) or resin printing.