How to Unclog a 3D Printer Nozzle: 5 Fixes Ranked from Easiest to Last Resort
3D printer nozzle clogged? Learn how to unclog it in minutes with 5 methods ranked by difficulty. Includes PLA-specific tips, a quick diagnosis check, and when to just replace it.
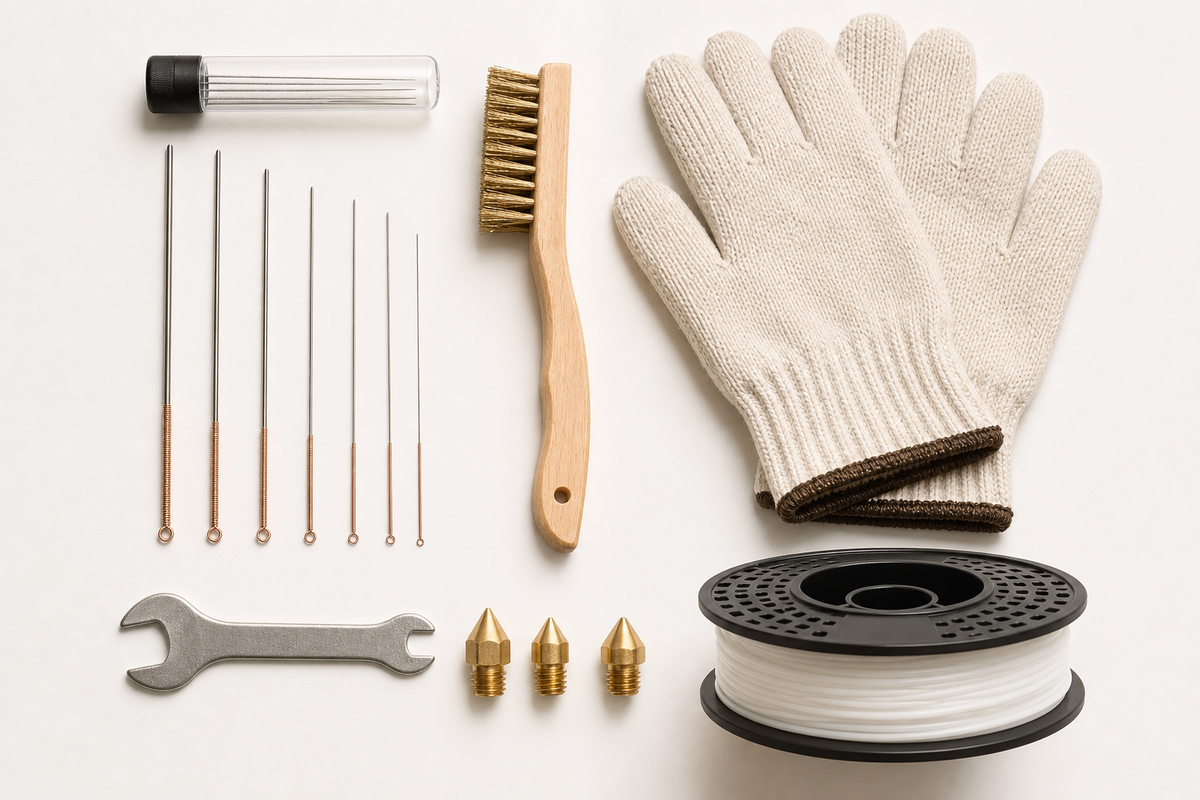
A clogged nozzle is the most common problem you will face with an FDM 3D printer. The good news: most clogs take less than 10 minutes to fix once you know what to do.
The bad news: if you pick the wrong method or skip diagnosis, you can waste an hour fighting a problem that was never a clog in the first place.
This guide gives you a clear path. We start with a quick symptom check, rule out common look-alikes, then walk through five unclogging methods ranked from the easiest two-minute fix to the nuclear option. Whether you are cleaning a 3D printer nozzle for the first time or dealing with a stubborn blockage, you will find the right fix here.
How to Tell If Your Nozzle Is Clogged
Before you grab tools, confirm that you are actually dealing with a clog. These are the five telltale symptoms:
No material comes out at all. The printer moves normally, the extruder motor turns, but nothing exits the nozzle. This is a complete blockage.
Thin, inconsistent layers. Filament still flows, but not enough. You see gaps, holes, or a "wispy" texture where solid plastic should be. This is a partial clog.
Clicking or grinding from the extruder. The motor tries to push filament forward but meets too much resistance. The gears slip, creating a rhythmic clicking sound. If you hear this, pause the print immediately.
Filament curls upward instead of laying flat. Molten plastic exits at an angle or coils back toward the nozzle instead of sticking to the bed. This happens when the opening is partially obstructed, creating uneven pressure.
Random blobs and heavy stringing. A partial blockage causes inconsistent pressure inside the nozzle. Plastic oozes out in bursts instead of flowing steadily.
If you are seeing one or more of these, you likely have a clog. But before you start disassembling anything, check three things first.
Before You Disassemble: Rule Out These 3 Things First
Many problems look exactly like a clogged nozzle but have nothing to do with the nozzle itself. Spending 30 seconds on these checks can save you from an unnecessary teardown.
| Material | Cold Pull Temp | Best Solvent | Clog Behavior | Recommended Method |
|---|---|---|---|---|
| PLA | 90°C | None effective | Becomes brittle when cool, snaps cleanly | Cold pull works great; PLA breaks away easily at 90°C |
| PETG | 120°C | None effective | Bonds aggressively to nozzle walls, stringy when pulled | Multiple cold pulls needed; cleaning filament recommended |
| ABS | 110°C | Acetone (very effective) | Hard and adhesive; resists needle clearing | Acetone soak overnight if cold pull fails |
Check Your Spool
Look at the filament spool. Is the filament tangled, crossed over itself, or snagged on the spool holder? A tangled spool creates tension that the extruder cannot overcome, mimicking a clog perfectly. Unwind a meter of filament by hand and watch for any resistance.
Also check whether the filament snapped somewhere inside the Bowden tube or feed path. A break means no material reaches the nozzle, even though the nozzle itself is clean.
Check Your Temperature
A "clog" that appears suddenly when you switch materials is often just a temperature mismatch. PETG at 190°C will barely flow. PLA at 170°C will jam.
Verify that your slicer temperature matches what the filament manufacturer recommends (printed on the spool label). If you recently changed materials, make sure the temperature profile updated too.
Check the Extruder Gear
Remove the filament and look at the drive gear inside the extruder. If the teeth are packed with plastic dust or the tension spring is loose, the gear cannot grip the filament. It skips and clicks, which sounds identical to a clog.
Clean the gear teeth with a small brush, re-tension the spring, and try again.
If all three checks pass → the nozzle is clogged. Continue below.
5 Ways to Unclog a 3D Printer Nozzle (Easiest First)
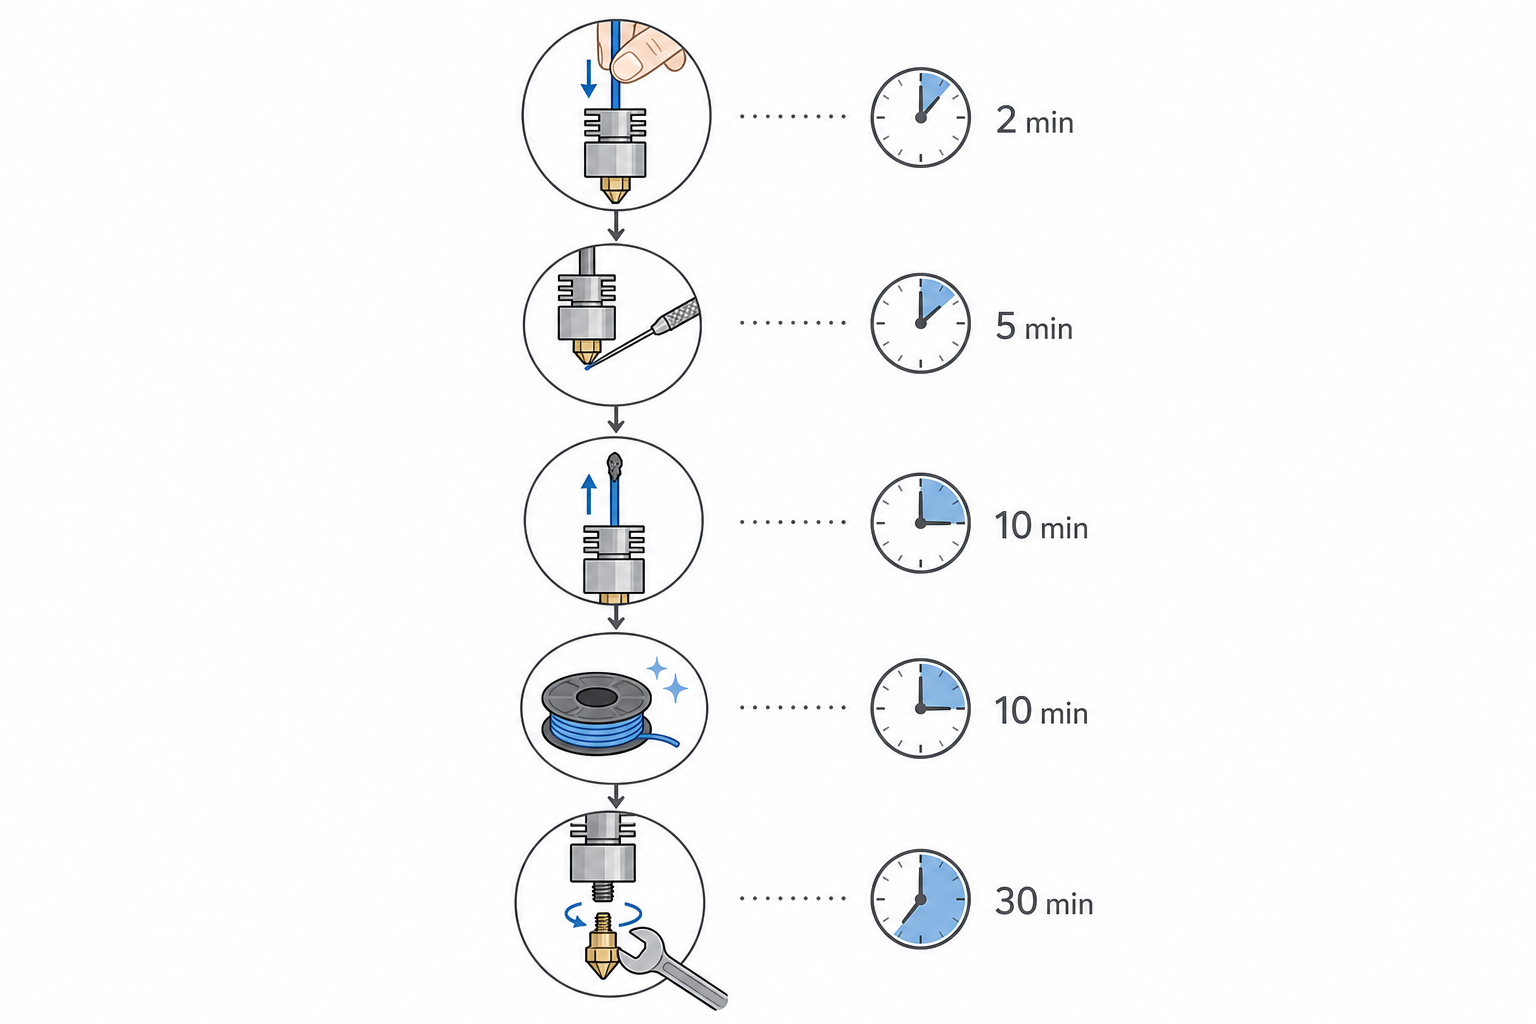
Start with Method 1. Only move to the next method if the previous one does not work. There is no reason to disassemble your printer if a 2-minute fix solves the problem.
Method 1: Manual Push-Through (~2 minutes)
Best for: soft partial clogs where filament still flows weakly.
Sometimes the extruder motor simply lacks the force to push through a soft obstruction. Your hand can apply more steady pressure.
- Heat the nozzle to your filament's normal printing temperature
- Release the extruder tension lever (so the gear no longer grips the filament)
- Push the filament down into the hot end firmly and steadily by hand
- Keep pushing for 5-10 seconds until you see clean filament flowing from the nozzle
If you feel the blockage give way and plastic starts flowing freely, you are done. Re-engage the extruder lever and resume printing.
If it does not work: the clog is harder than hand pressure can clear. Move to Method 2.
Method 2: Cleaning Needle (~5 minutes)
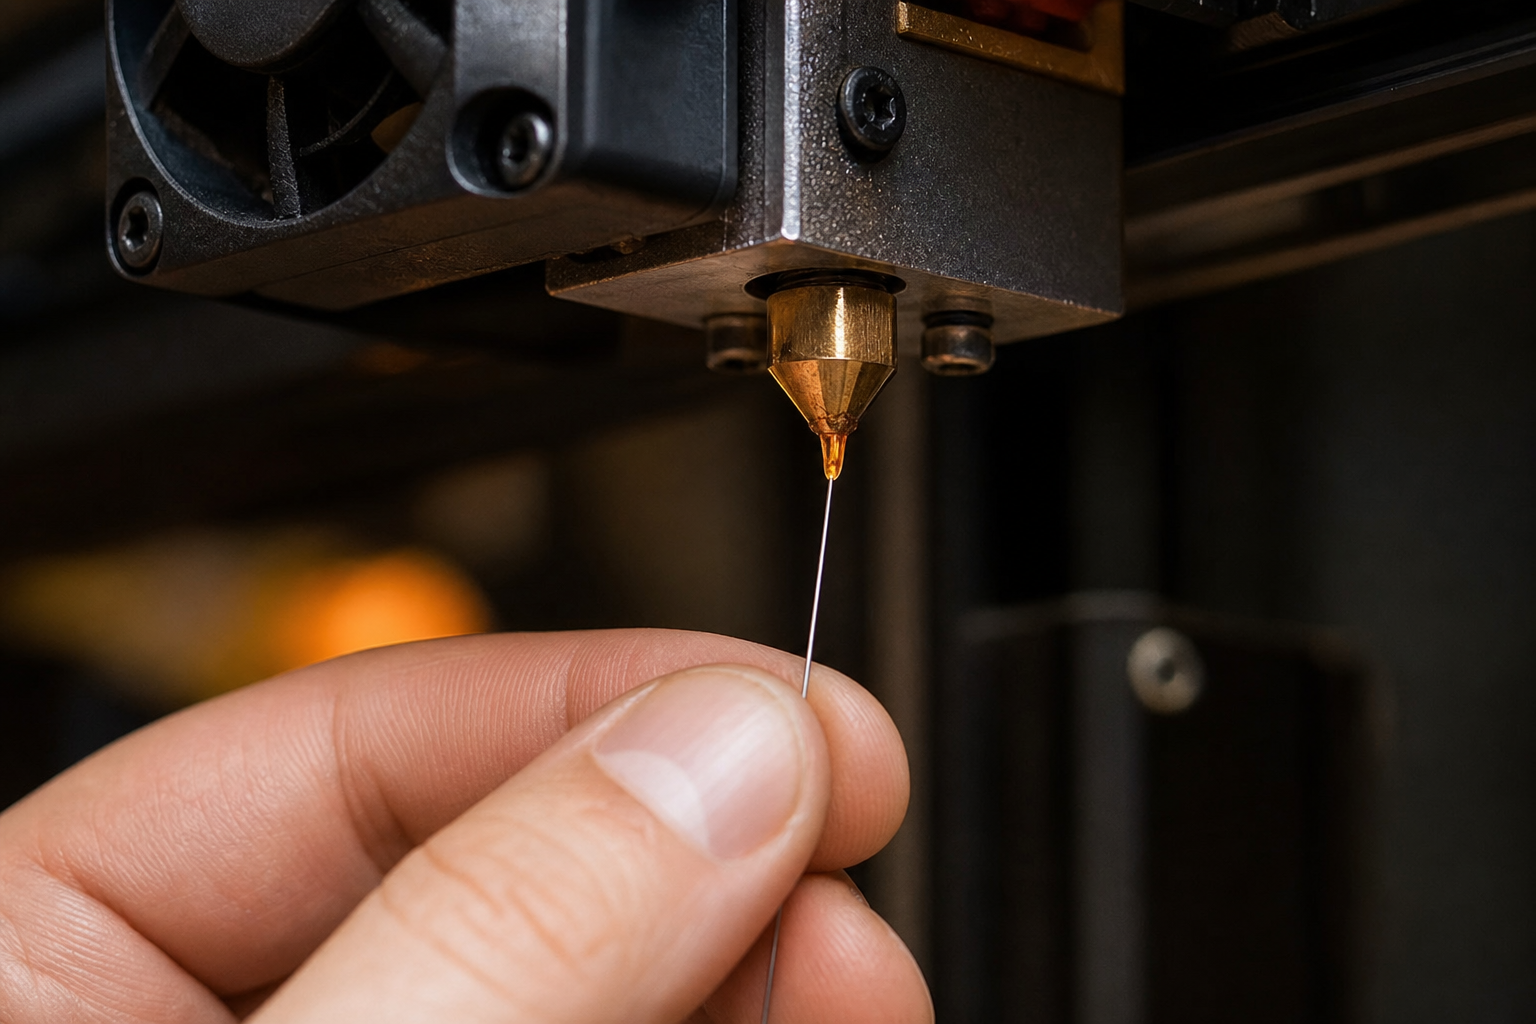
Best for: debris or carbonized bits stuck near the nozzle tip.
A nozzle cleaner needle (usually 0.3-0.4mm) can break apart material blocking the opening from below.
- Heat the nozzle to printing temperature
- Insert the cleaning needle upward into the nozzle opening (about 1cm deep)
- Gently move it up and down to break apart the blockage. Do not force it sideways as you may widen the nozzle hole
- Remove the needle and try extruding filament manually or via the printer menu
- Repeat 2-3 times if needed
Most 3D printers include a cleaning needle in the box. If yours did not, acupuncture needles or a thin piece of high-E guitar string work as substitutes.
If it does not work: the blockage is deeper inside the hot end, beyond what a needle can reach. Move to Method 3.
Method 3: Cold Pull (~10 minutes)
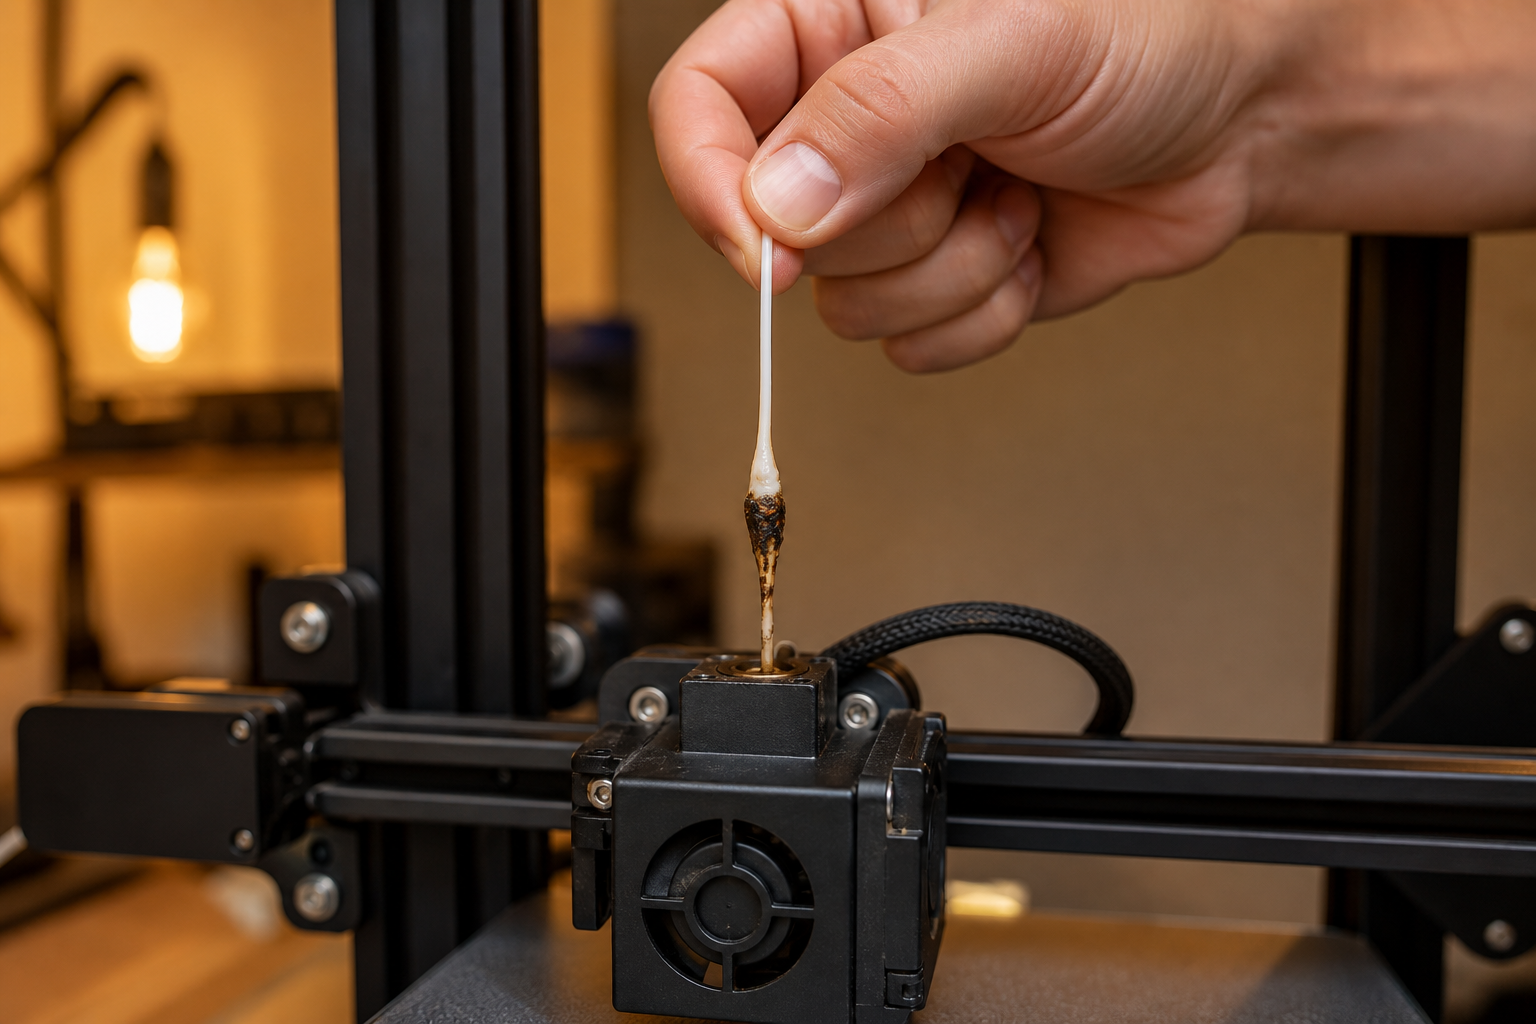
Best for: internal carbonized residue, color contamination, and deep partial clogs. This is the most effective general-purpose cleaning method for any 3D printer nozzle.
The cold pull (also called the "atomic method") works by using filament itself as a cleaning tool. You heat it, let it bond to the debris inside, cool it to a semi-solid state, then yank it out, pulling the clog with it.
- Heat the nozzle to your filament's printing temperature (e.g., 200°C for PLA)
- Manually push filament in until it begins to extrude from the nozzle
- Turn off the heater and let the nozzle cool to the "pull temperature":
- PLA: 90°C
- PETG: 120°C
- Nylon/cleaning filament: 110°C
- Once the temperature reaches the target, grip the filament firmly and give it a quick, decisive upward pull
- Inspect the tip of the pulled filament. It should show a clean nozzle-shaped cone. Dark specks or discolored residue on the tip means it pulled out debris
Repeat until the pulled filament comes out clean (usually 2-4 pulls). When it comes out with a perfect, uniform tip and no dark residue, your nozzle is clear.
If it does not work after 5+ attempts: the clog may be too hard or too deeply bonded. Move to Method 4.
Method 4: Cleaning Filament Purge (~10 minutes)
Best for: stubborn clogs that resist normal cold pulls, or thorough cleaning after switching between very different materials.
Dedicated cleaning filament (usually nylon-based) is engineered to be stickier than standard filament when semi-molten. It grabs onto carbonized particles that PLA would slide past.
- Heat the nozzle to 250°C (cleaning filament works at higher temps)
- Feed the cleaning filament in manually until it extrudes
- Let the temperature drop to 110°C
- Perform a cold pull (same technique as Method 3)
- Repeat 3-5 times
Cleaning filament is available from most 3D printing retailers in short lengths specifically for maintenance. A single pack lasts dozens of cleaning sessions.
If it does not work: the nozzle is completely sealed or physically damaged. Move to Method 5.
Method 5: Remove and Soak or Replace (~30+ minutes)
Best for: total blockages that no in-situ method can clear, or nozzles that clog repeatedly after cleaning.
This is the last resort. You physically remove the nozzle from the printer.
- Heat the nozzle to printing temperature
- Using a wrench (and heat-resistant gloves), unscrew the nozzle from the heat block. Always remove nozzles while hot, as thermal expansion makes cold removal risky for stripping threads
- Once removed, you have two choices:
Option A: Solvent soak
- ABS clogs: submerge the nozzle in acetone for 12-24 hours
- PLA clogs: soak in ethyl acetate or try a heat gun to burn out residue (PLA does not dissolve easily in household solvents)
- After soaking, push a needle through to clear softened material
Option B: Replace the nozzle
- Brass nozzles cost under $1 each. If soaking sounds tedious, simply install a fresh nozzle. Done in 5 minutes.
Screw the clean or new nozzle back in while the heat block is warm. Finger-tight first, then a quarter turn with a wrench. Do not overtighten.
Unclogging by Material: PLA vs PETG vs ABS
Different materials behave differently when stuck inside a nozzle. The "right" temperature and method varies:
The most common scenario: you switched from PETG to PLA without purging. Leftover PETG (which requires 230°C+) does not melt at PLA temperatures (200°C), creating an instant blockage. The fix: heat to 240°C, purge thoroughly, then switch to PLA. Always purge at the higher material's temperature when transitioning.
What Causes Nozzle Clogs (And How to Prevent Them)
Understanding why clogs happen lets you stop them before they start:
Dust and debris on filament. Tiny particles on the filament surface accumulate inside the nozzle over time. → Prevention: use a filament wiper or filter (a small sponge clip that sits on the filament path before the extruder). Costs a few dollars and dramatically reduces contamination.
Heat creep. Heat travels up from the heater block into the cold zone, softening filament prematurely and creating a plug above the melt zone. → Prevention: make sure the heatsink fan is running and unobstructed. Heat creep almost always means the cooling fan has failed or is spinning too slowly.
Switching materials without purging. Leftover high-temp material solidifies when you print with a lower-temp filament. → Prevention: always do a cold pull or purge run when changing material types. This takes 2 minutes and prevents hours of troubleshooting.
Low-quality or wet filament. Cheap filament contains impurities. Moisture-absorbed filament bubbles and chars inside the nozzle. → Prevention: buy reputable brands, store filament in sealed containers with desiccant, and dry filament if it has been exposed to humid air for more than a few days.
Printing temperature too low. Filament that does not fully melt creates partial obstructions. → Prevention: print within the manufacturer's recommended range. If unsure, start at the middle of the range and adjust from there.
PTFE tube not seated properly. A gap between the tube and nozzle allows molten filament to pool and carbonize in the crevice. → Prevention: when reassembling, ensure the PTFE tube is pushed firmly against the back of the nozzle with zero gap.
A simple maintenance habit that prevents most clogs: do one cold pull every time you change filament types, and give the nozzle exterior a quick wipe with a brass brush after each print session. Total time: under 2 minutes.
When to Stop Cleaning and Just Replace the Nozzle
New users often spend 45 minutes trying to resurrect a nozzle that costs less than a dollar. Here is when to skip cleaning and just swap:
- You have spent more than 20 minutes on methods 1-4 with no improvement. Your time is worth more than the nozzle.
- You regularly print with abrasive filaments (carbon fiber, glow-in-the-dark, metal-filled, wood-filled). These physically erode brass nozzles from the inside, widening the hole and degrading print quality. No amount of cleaning fixes mechanical wear.
- The nozzle tip is visibly deformed, scratched, or rounded. A damaged tip produces poor-quality prints regardless of cleanliness.
- Clogs return within 1-2 prints after cleaning. This usually means internal damage or a worn PTFE liner, not just residue.
Keep 2-3 spare nozzles on hand. Brass nozzles in 0.4mm (the standard size) are available in multi-packs for under $10. If you print abrasive materials, invest in hardened steel nozzles which last 10-50x longer than brass.
If you are looking for how to set up a printer properly from the start to minimize these issues, our beginner's guide to using a 3D printer covers the full workflow.
 Editorial Team
Frequently Asked Questions
What to do if a 3D printer nozzle is clogged?
Start with the simplest fix: heat the nozzle and push filament through by hand. If that fails, use a cleaning needle. If that fails, do a cold pull (heat, insert filament, cool to 90°C, pull sharply). Most clogs clear within the first three methods. For complete blockages, remove the nozzle and soak it in solvent or replace it entirely. Always work from easiest to hardest.
How to dissolve PLA from a nozzle?
PLA does not dissolve easily in common household solvents. Acetone does not work on PLA (it works on ABS). Ethyl acetate can soften PLA but takes many hours and is not widely available. The most practical approach for PLA clogs is a cold pull at 90°C, which exploits PLA's brittleness. At that temperature, PLA is solid enough to pull out cleanly but soft enough to detach from the nozzle walls. Repeat until clear.
How often should you clean the nozzle on a 3D printer?
Do a cold pull every time you switch filament types, and every 50-100 hours of printing as routine maintenance. Wipe the nozzle exterior with a brass brush after every print session. If you only use one type of PLA and print occasionally, a monthly cold pull is sufficient. If you print daily or use multiple materials, weekly maintenance keeps things running smoothly.
How to tell if a 3D print nozzle is clogged?
The clearest sign is under-extrusion or no extrusion at all, combined with the extruder motor clicking. To confirm: heat the nozzle, release the extruder lever, and push filament in by hand. If you feel strong resistance or nothing comes out, the nozzle is clogged. If filament feeds smoothly by hand but the printer still under-extrudes, the problem is likely the extruder gear or a Bowden tube issue, not the nozzle.
How to get dried filament out of a nozzle?
Heat the nozzle to 10-20°C above the filament's normal printing temperature to soften the dried material. Then attempt a manual push-through or cold pull. If the filament has carbonized (turned dark and hard from sitting at high temperature for too long), repeated cold pulls with nylon cleaning filament at 250°C are the most effective method. For completely hardened clogs that resist heat, remove the nozzle and use a heat gun or solvent soak.