3D Print Infill: Patterns, Density, and Settings Explained for Beginners
Infill is the internal structure hidden inside your 3D prints. It determines strength, weight, print time, and material use. This guide explains every pattern, helps you pick the right density, and shows you how to set it up in your slicer.
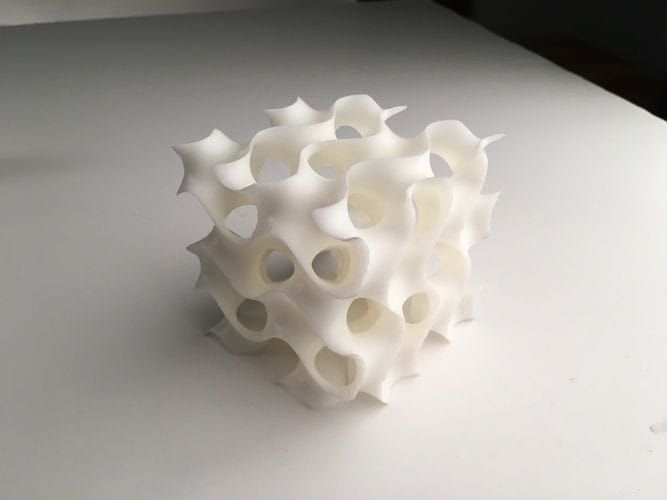
Every 3D print has a secret inside. Crack one open and you'll find it isn't solid all the way through. Instead, there's a geometric pattern filling the interior, like a honeycomb or lattice hidden beneath the outer walls. This is 3D print infill, and getting it right can mean the difference between a part that snaps on first use and one that holds up for years.
This guide explains what infill is, how to choose the right density and pattern, and how to configure it in your slicer without overthinking it.
What Is Infill in 3D Printing?
Infill is the internal structure printed inside the walls of your model. Think of it like the skeleton inside a bone: the outside is solid and smooth, but the inside uses a lighter, patterned structure that provides strength without unnecessary weight.
Every 3D print has three main components:
- Outer walls (shells/perimeters): The visible exterior surface
- Top and bottom layers: Solid layers that cap the model
- Infill: The pattern between the walls, hidden from view
Why not just print everything 100% solid? Three reasons:
- Time. A solid print can take 3-5x longer than one with 20% infill
- Material. More plastic means more cost per print
- Weight. For many applications, lighter is better
The infill density (percentage) and pattern you choose directly affect how strong, heavy, fast, and expensive your print will be.
How Infill Affects Your Print
| Factor | Low Infill (10-15%) | Medium (20-30%) | High (50%+) |
|---|---|---|---|
| Strength | Weak | Good for most uses | Very strong |
| Weight | Light | Moderate | Heavy |
| Print time | Fast | Moderate | Slow |
| Material cost | Low | Medium | High |
| Top surface quality | May sag | Good | Excellent |
That last row catches many beginners off guard. If your infill density is too low, the top layers of your print have nothing to rest on. They sag or show a bumpy "pillowing" pattern on flat surfaces. This is one of the main reasons you shouldn't go below 15% for prints with large flat tops.
3D Printing Infill Density: What Percentage Should You Use?
The 3D print infill percentage controls how much of the interior is filled with material. Here's a practical guide based on what you're actually printing:
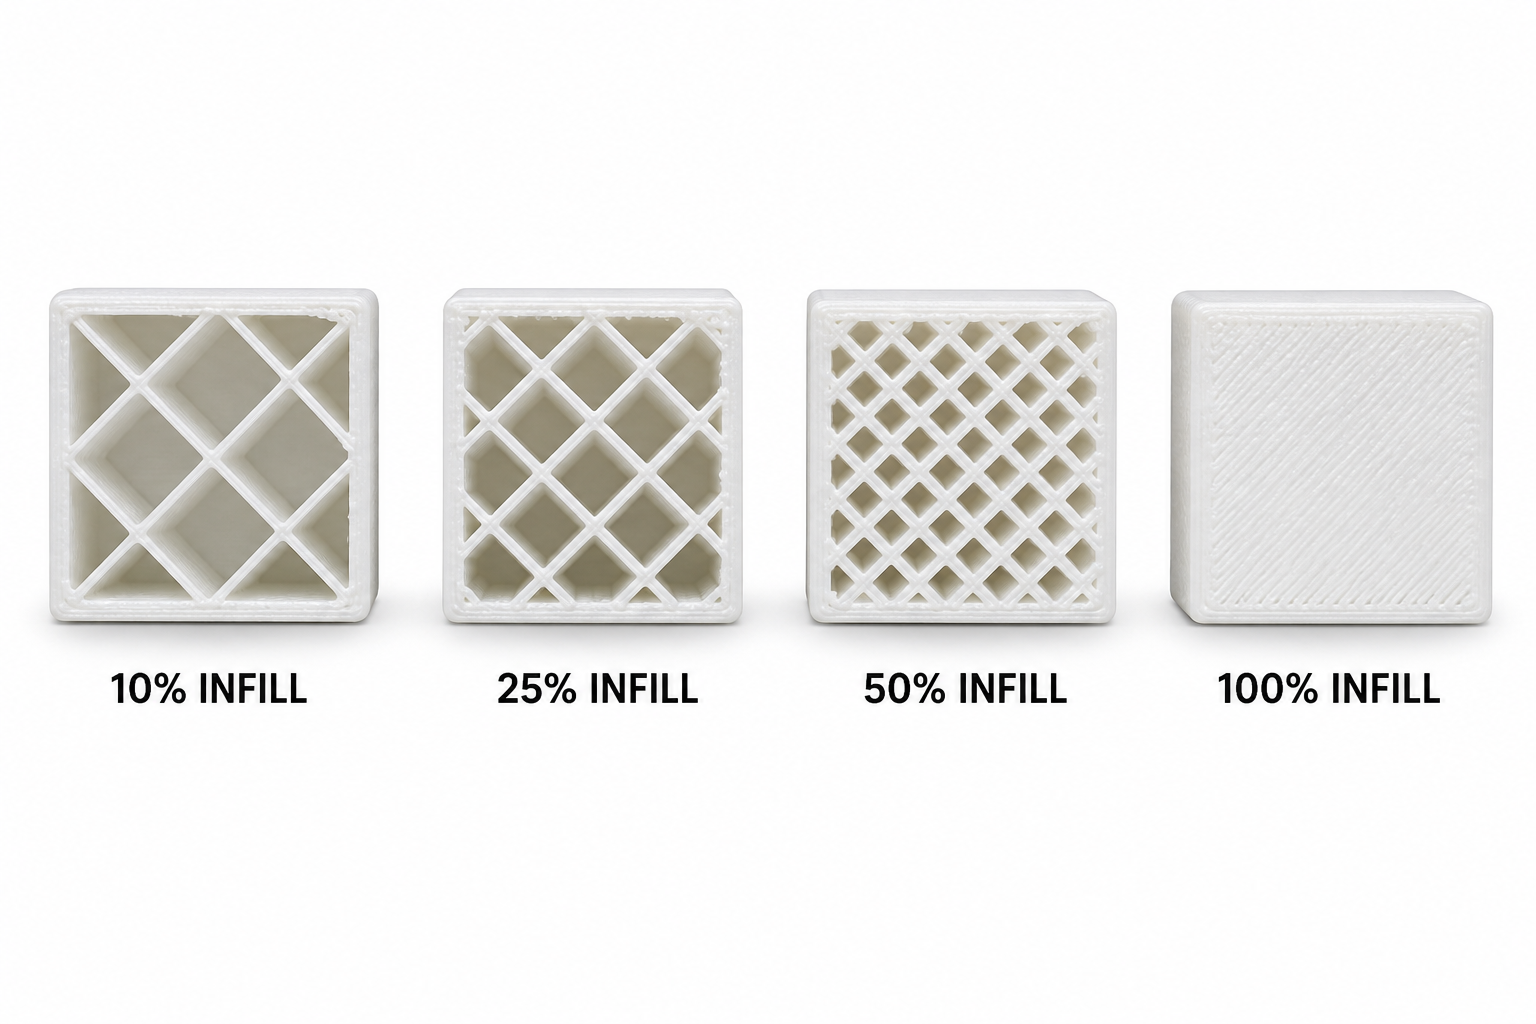
| Density | Best For | Examples |
|---|---|---|
| 0-5% | Display models, hollow decorative items | Vases, sculptures, figurines on a shelf |
| 10-15% | Prototypes, low-stress items | Test fits, visual mockups, phone stands |
| 20-30% | General purpose (the default sweet spot) | Cases, brackets, organizers, toys |
| 40-60% | Functional parts under stress | Mounts, gears, tool handles, drone frames |
| 80-100% | Maximum strength, load-bearing | Bolted joints, small structural parts, pulleys |
The beginner rule of thumb: Start at 20%. Only go higher if the part will bear mechanical load. Only go lower if it's purely decorative.
Is 100% Infill Always the Strongest?
Not necessarily. This surprises most people, but 100% infill density doesn't always produce the strongest part. Here's why:
Adding more wall layers (perimeters) often adds more strength than increasing infill. A part with 4-6 walls and 30% infill is frequently stronger in bending tests than the same part with 2 walls and 100% infill. The walls carry most of the load in bending and impact scenarios.
Where 100% infill does matter:
- Very small parts where walls alone can't provide enough cross-section
- Parts that receive bolts or screws (infill prevents crushing around the hole)
- Compression loads applied evenly across the part
For most beginner prints, 20-30% infill with 3-4 walls is the optimal balance of strength, speed, and material use.
3D Printing Infill Patterns Explained
The infill pattern determines the shape of the internal geometry. Different patterns have different strengths, print speeds, and behaviors.
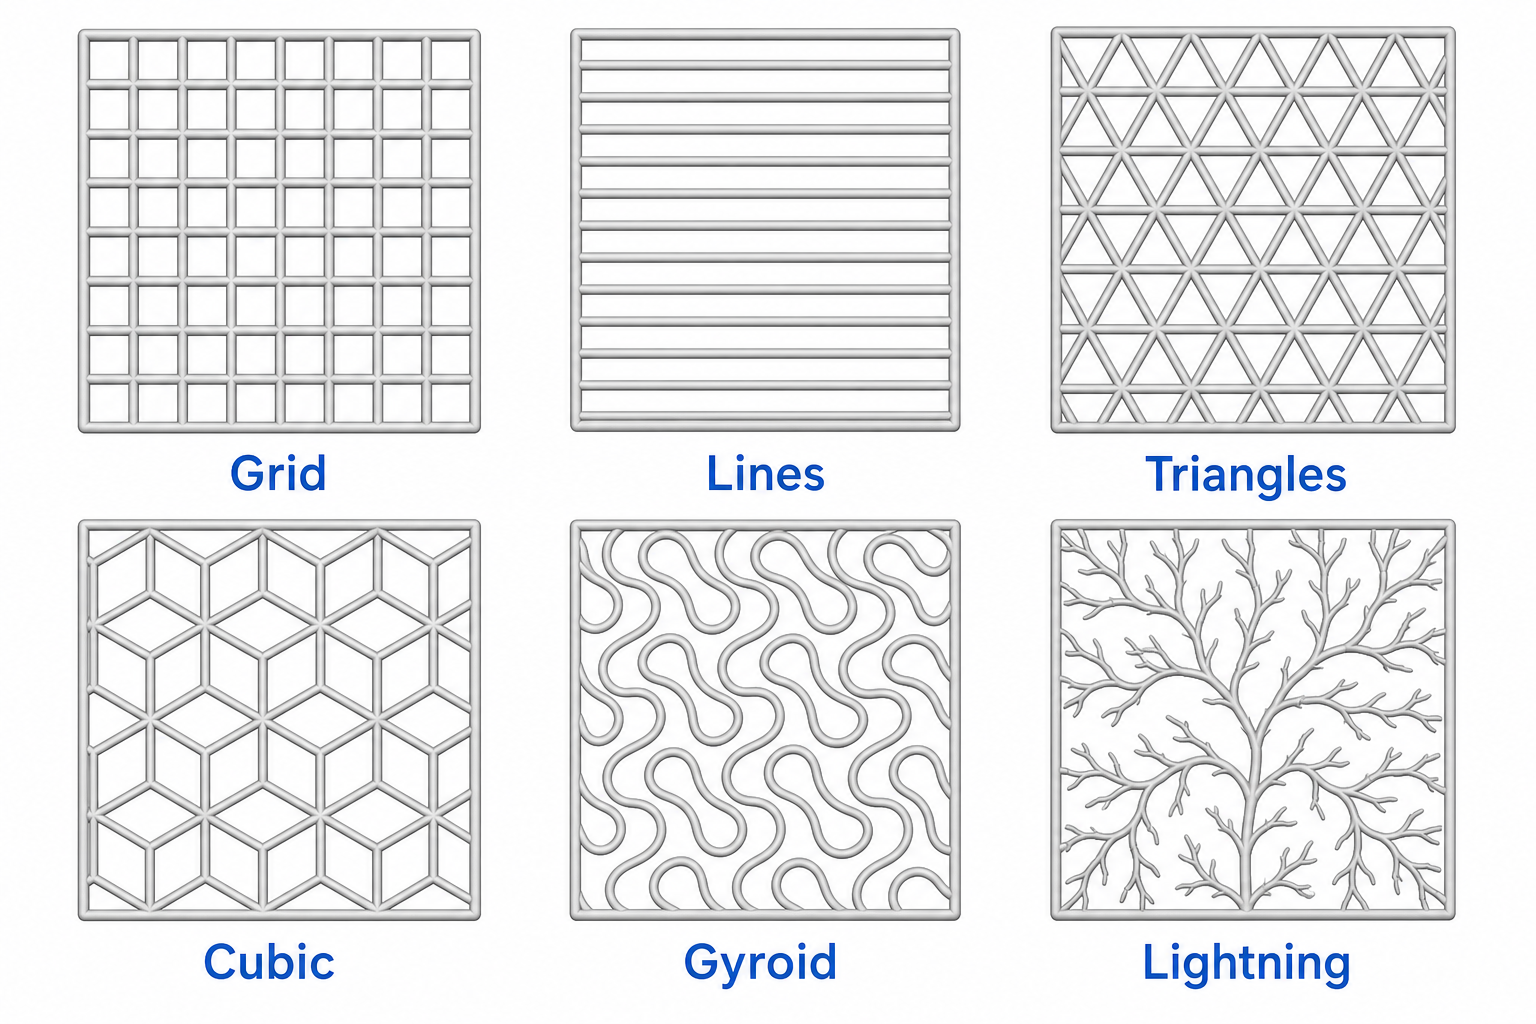
Grid
The most common default pattern. Two sets of perpendicular lines form a simple square grid. Grid is strong in the X and Y directions but weaker on diagonal forces. It prints relatively quickly and works well for general-purpose parts.
Best for: General use, beginners who don't want to overthink it.
Lines (Rectilinear)
Single-direction lines that alternate 90° between layers. This is the fastest infill pattern because the nozzle moves in straight sweeps without direction changes. However, it's weaker than Grid because each individual layer only has strength in one direction.
Best for: Fast prototypes, test prints, anything where speed matters more than strength.
Triangles
Triangular tessellation provides excellent resistance to horizontal forces from all directions within the XY plane. It's slightly slower than Grid but noticeably stronger for parts that receive lateral loads.
Best for: Parts under shear stress, thin-walled containers, anything pushed sideways.
Cubic
Tilted cubes that create a 3D pattern with roughly equal strength in all three axes (X, Y, and Z). Unlike Grid and Triangles which are strong horizontally but weaker vertically, Cubic adds diagonal connections that resist forces from any direction.
Best for: Parts loaded from unpredictable directions, structural components, brackets.
Gyroid
A continuous, wavy surface that curves through all three dimensions without any flat intersection points. Gyroid provides nearly equal strength in every direction, compresses evenly without sudden failure, and has no internal pockets that trap moisture. It's widely considered the best all-around infill pattern for strength.
Because Gyroid has no sharp corners where lines cross, it also produces less stringing and vibration during printing compared to patterns with many direction changes.
Best for: Functional parts requiring all-direction strength, flexible prints, anything structural. The best infill pattern for strength in most scenarios.
Lightning
A tree-like structure that branches only where needed to support the top surfaces of your model. Everywhere else is completely empty. Lightning uses dramatically less material and time than any other pattern at the same stated density.
The tradeoff: almost zero structural strength. Lightning infill exists only to prevent top-layer sagging, not to make the part strong.
Best for: Display models, cosplay props, decorative items, anything where internal strength is irrelevant.
Best Infill Pattern for Strength
If your part needs to be strong, here's how to choose:
| Load Type | Best Pattern | Why |
|---|---|---|
| Forces from any direction | Gyroid or Cubic | Equal strength in all axes |
| Sideways push/pull (shear) | Triangles | Excellent lateral resistance |
| Top-down compression | Grid | Vertical columns resist downward force |
| Flexibility needed | Gyroid | Deforms evenly, no sudden snap |
| Unknown loads (be safe) | Gyroid at 25-30% | Best general-purpose option |
The recommendation for beginners who don't want to research further: Use Gyroid at 20-30% density. It handles virtually every load scenario well, prints cleanly, and uses material efficiently. You can't go wrong with it.
For the absolute strongest parts, combine Gyroid or Cubic infill with more walls (4-6 perimeters). The walls handle bending forces while the infill handles compression and prevents buckling.
How to Set Infill in Your Slicer
Bambu Studio Infill Settings
- Select your model and go to the Process settings (right panel)
- Click Strength tab
- Sparse infill density: Set your percentage (e.g., 20%)
- Sparse infill pattern: Choose from the dropdown (Grid, Gyroid, Triangles, etc.)
- Wall loops: Set to 3-4 for balanced strength (under the same Strength tab)
Additional settings under Advanced:
- Infill/wall overlap: Controls how much infill overlaps with inner walls (default 15% works well)
- Top surface pattern: Separate from infill, this controls how your visible top layer looks
Bambu Studio's presets (Normal, Strength, Speed) automatically adjust infill density, so check what's already set before changing values.
Cura Infill Settings
- Open your model in Cura
- In the right settings panel, find the Infill section
- Infill Density: Set percentage
- Infill Pattern: Choose from dropdown
- Infill Line Distance: Auto-calculated from density (usually leave alone)
Key Cura-specific options:
- Gradual Infill Steps: Reduces infill density toward the bottom of the model (saves material)
- Infill Before Walls: Printing infill first can improve dimensional accuracy on some parts
- Connect Infill Lines: Reduces travel moves within infill (less stringing)
Creality Print Infill Patterns
Creality Print (the slicer for Ender and K1 series printers) offers similar infill patterns to Cura:
- Go to Print Settings > Infill
- Set Infill Density as a percentage
- Choose Infill Pattern from the available options
Creality Print supports Grid, Lines, Triangles, Cubic, and Gyroid among others. For Ender 3 and similar bed-slinger printers, keep in mind that complex patterns like Gyroid may print slightly slower due to the constant direction changes moving the heavy bed.
Common Infill Problems and How to Fix Them
Weak or Crumbling Infill
The internal structure breaks easily or looks under-filled.
Causes and fixes:
- Print speed too high for infill: Reduce infill speed by 20-30%
- Temperature too low: Increase by 5°C so layers bond properly
- Under-extrusion: Check for partial clog, increase flow rate by 2-5%
- Old or brittle filament: Try a fresh spool
Top Surface Pillowing or Sagging
Flat top surfaces show bumps, gaps, or a wavy texture.
Causes and fixes:
- Infill too low (below 15%): Increase to 20% or add more top solid layers (5-6 layers minimum). If your first layer also isn't sticking, that's a separate adhesion issue
- Cooling too aggressive on top layers: Reduce fan speed slightly for the first top layer
- Not enough top layers: Most slicers default to 3-4, increase to 5-6 for low infill prints
This is one of the most common reasons beginners think their printer is broken. It's almost always just a settings issue. You can keep low infill (10-15%) if you add extra top layers to bridge the gaps.
Infill Not Connecting to Walls
Visible gaps between the inner wall and the start of infill lines, creating a weak seam that can lead to parts warping or splitting under stress.
Causes and fixes:
- Infill/wall overlap too low: Increase to 15-25% in slicer settings
- In Cura: Look for "Infill Overlap Percentage"
- In Bambu Studio: Check "Infill/wall overlap" under Advanced
Infill Showing Through Walls (Ghosting)
You can see the infill pattern as a faint texture on the outer surface.
Causes and fixes:
- Not enough walls: Increase from 2 to 3-4 perimeters
- Print too hot: Reduce temperature 5°C so walls solidify before infill pushes against them
- Infill printed before walls: Change print order to "walls first" (Outer wall → Inner wall → Infill)
Infill Tips for Saving Time and Material
Once you understand the basics, these strategies help you optimize further:
More walls, less infill. Going from 2 walls + 30% infill to 4 walls + 15% infill often gives similar strength but prints faster and uses less material. The walls are more structurally efficient than infill for most load types.
Lightning infill for display pieces. If a model will sit on a shelf and never be stressed, Lightning at 10% uses dramatically less filament (sometimes 40-50% less than Grid at the same percentage) while still supporting the top surface.
Match pattern to load direction. If you know how a part will be loaded, choose accordingly: Grid for top-down compression, Triangles for sideways forces, Gyroid for "I don't know."
Variable infill density. Some slicers (including Bambu Studio) support gradient or adaptive infill, where density is higher near the top surfaces and lower in the center. This gives you good surface quality without filling the whole interior. In Bambu Studio, look for "Adaptive infill" options.
Minimum viable density. For quick test prints to check fit or dimensions, drop to 5-10% with Lightning pattern. You'll get the shape in a fraction of the time. Only bump up density on the final version.
FAQ
Is 10% infill okay?
For decorative items, prototypes, and test prints, 10% infill works fine. It's not enough for functional parts that will bear weight or mechanical stress. Watch out for top surface quality: if your print has large flat tops, 10% may cause sagging (fix by adding more top layers).
Is 30% infill too much?
No. 30% is actually a great all-around density for functional parts. It provides solid strength for everyday items without excessive print time or material waste. Many experienced users settle on 20-30% as their standard for anything that needs to be durable.
Is 5% infill too little?
For most prints, yes. At 5%, the internal structure is extremely sparse and the part will be fragile. Top surfaces will likely sag without additional top layers (6+). Only use 5% for purely visual models, vases, or display pieces that will never be handled roughly.
What is 3D printing infill?
Infill is the internal pattern printed inside the outer walls of a 3D print. Instead of printing a solid block (which wastes time and material), slicers fill the interior with a geometric pattern at a specified density. The pattern and density you choose control the part's strength, weight, print time, and material consumption.