Best 3D Printer for Miniatures in 2026: A Tabletop Gamer's Guide
Top 7 printers for miniatures with cost breakdowns, resin safety tips, and a complete beginner workflow.
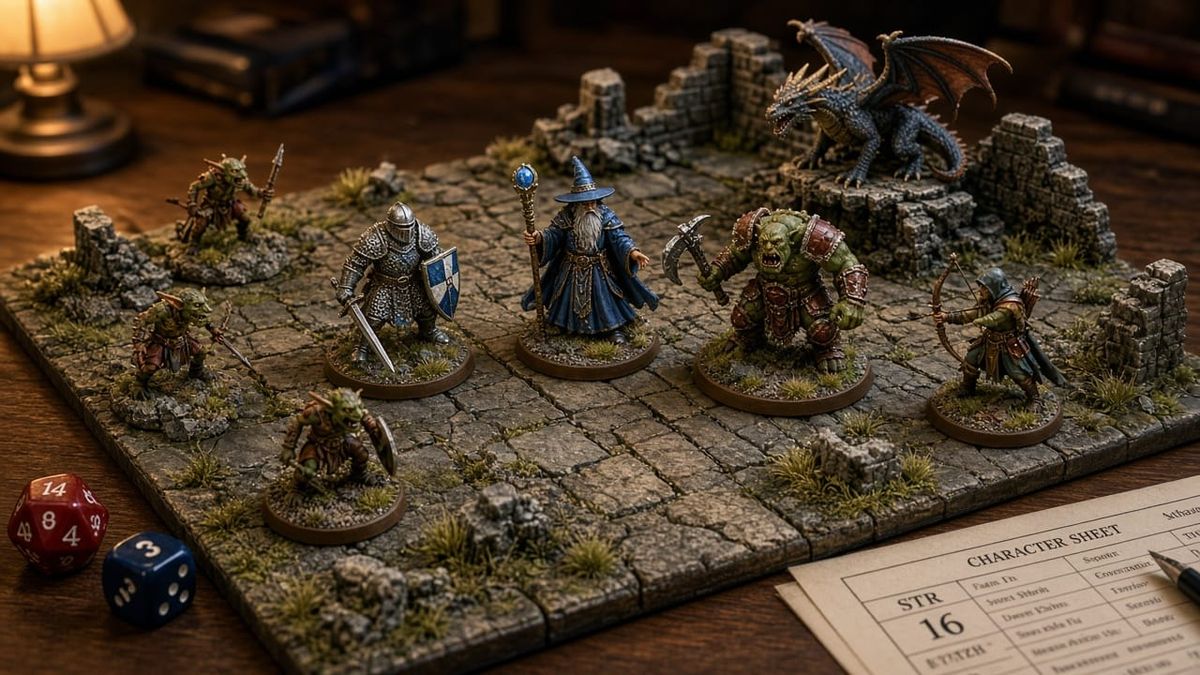
If you play Warhammer 40K, D&D, Age of Sigmar, or any tabletop game that uses miniatures, you have probably thought about printing your own. The math alone makes it tempting. A box of 10 Space Marines costs $50 to $60 from Games Workshop. Printing 10 equivalent miniatures in resin costs about $2 to $4 in material.
But the 3D printer for miniatures market has a lot of options, and picking the wrong one means wasting money on a machine that cannot deliver the detail you need. The short version: resin printers are the clear winner for miniatures because they produce fine detail that FDM simply cannot match at 28mm to 32mm scale. But FDM printers have their place too, especially for terrain, and some people prefer to avoid resin entirely for safety or convenience reasons.
This guide covers both. I have printed hundreds of minis across multiple machines and will tell you exactly which printers deliver the best results, what the full setup actually costs, and how to go from a fresh-out-of-the-box printer to painted miniatures on your gaming table.
Quick Pick: Our Top 3 Recommendations
If you already know what you want and just need a fast answer:
| Category | Pick | Price | Why |
|---|---|---|---|
| Best Overall (Resin) | Elegoo Mars 5 Ultra | ~$280 | Best detail-to-price ratio, tilt release, fast prints |
| Best Budget (Resin) | Elegoo Mars 4 | ~$170 | Incredible value, 9K resolution, proven reliability |
| Best for Terrain + Minis (Resin) | Elegoo Saturn 4 Ultra | ~$450 | Large build plate for batch printing and terrain tiles |
| Best FDM (No Resin) | Bambu Lab X2D | ~$549 | Dual extruder, Core XY precision, multi-color without purge waste |
Read on for detailed reviews of all 7 picks plus the complete setup guide.
Best Resin Printers for Miniatures
Resin printers use UV light to cure liquid resin layer by layer, producing details that are invisible to the naked eye at miniature scale. For 3D printing miniatures at 28mm to 32mm heroic scale, resin is the gold standard.
Elegoo Mars 5 Ultra: Best Overall 3D Printer for Miniatures
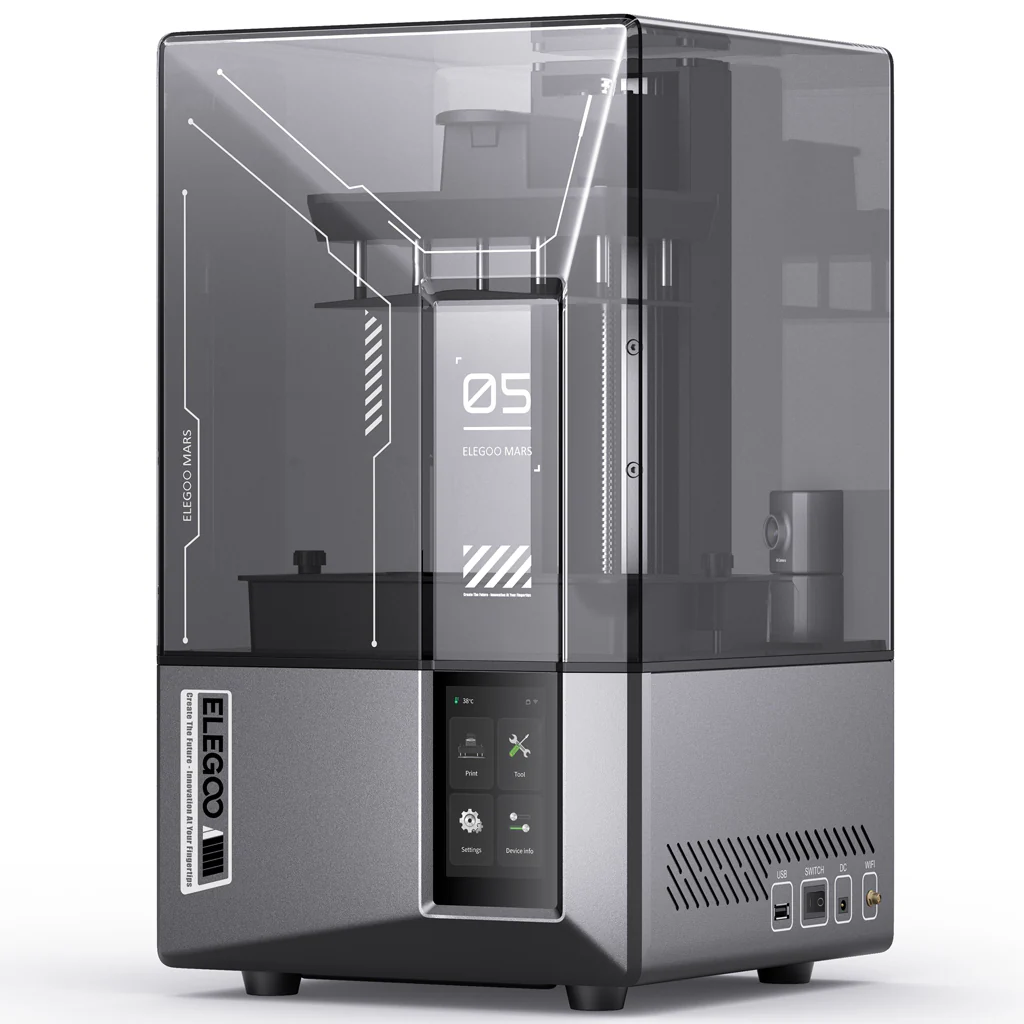
Price: ~$280 XY Resolution: 18 microns (9.1K) Build Volume: 153 x 77 x 165mm Light Source: COB LED + Fresnel lens
The Mars 5 Ultra is the best resin printer for miniatures in 2026 for most people. The 18-micron XY resolution captures chainmail texture, facial expressions, and weapon details that you will only notice under magnification. The tilt release mechanism reduces peel forces, which means fewer failed prints and better success rates with delicate miniatures that have thin swords, staffs, or antennae.
The build volume is sized for miniatures. You can fit 6 to 10 standard 28mm minis on the plate in a single run. Larger models (dragons, vehicles) print without issue if you orient them diagonally.
I have run roughly 200 prints on a Mars 5 Ultra and the failure rate has been under 5%, most of which were my own support placement mistakes rather than printer issues. Print speed is fast for a resin machine, typically 2 to 4 hours for a full plate of minis.
Who should buy this: Anyone who wants the best miniature detail without spending more than $300 on the printer. This is the machine I recommend to friends who ask me what to buy.
Potential downside: The build plate is not large enough for terrain tiles. If you want to print dungeon floors and buildings alongside minis, look at the Saturn 4 Ultra below.
Phrozen Sonic Mini 8K S: Best Resolution for Tiny Details
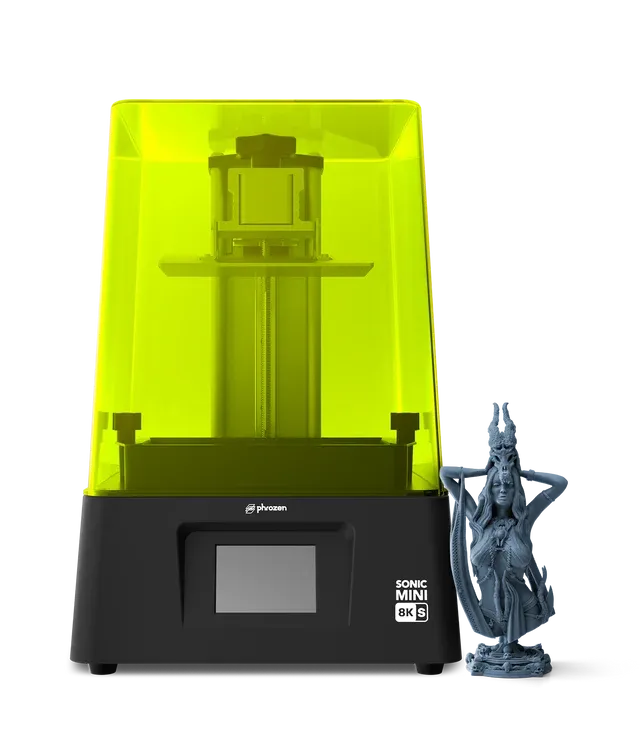
Price: ~$300 XY Resolution: 22 microns (7.5K per panel) Build Volume: 165 x 72 x 180mm Light Source: Dual COB LED
The Sonic Mini 8K S pushes resolution to the extreme. If you paint at competition level or regularly photograph your minis for social media, this is the printer that will reward the extra effort. The difference between 22-micron and 18-micron resolution is subtle at tabletop viewing distance, but it shows up clearly in macro photography and under magnification.
Phrozen's build quality is solid, and the dual COB LED system provides even light distribution across the screen, which reduces the "center vs edge" quality variation that cheaper printers can exhibit.
Who should buy this: Competitive painters, display piece collectors, and anyone who zooms in on photos of their minis. If you mostly play tabletop games at arm's length, the Mars 5 Ultra offers similar practical results for slightly less money.
Anycubic Photon Mono M7: Best Value Mid-Range
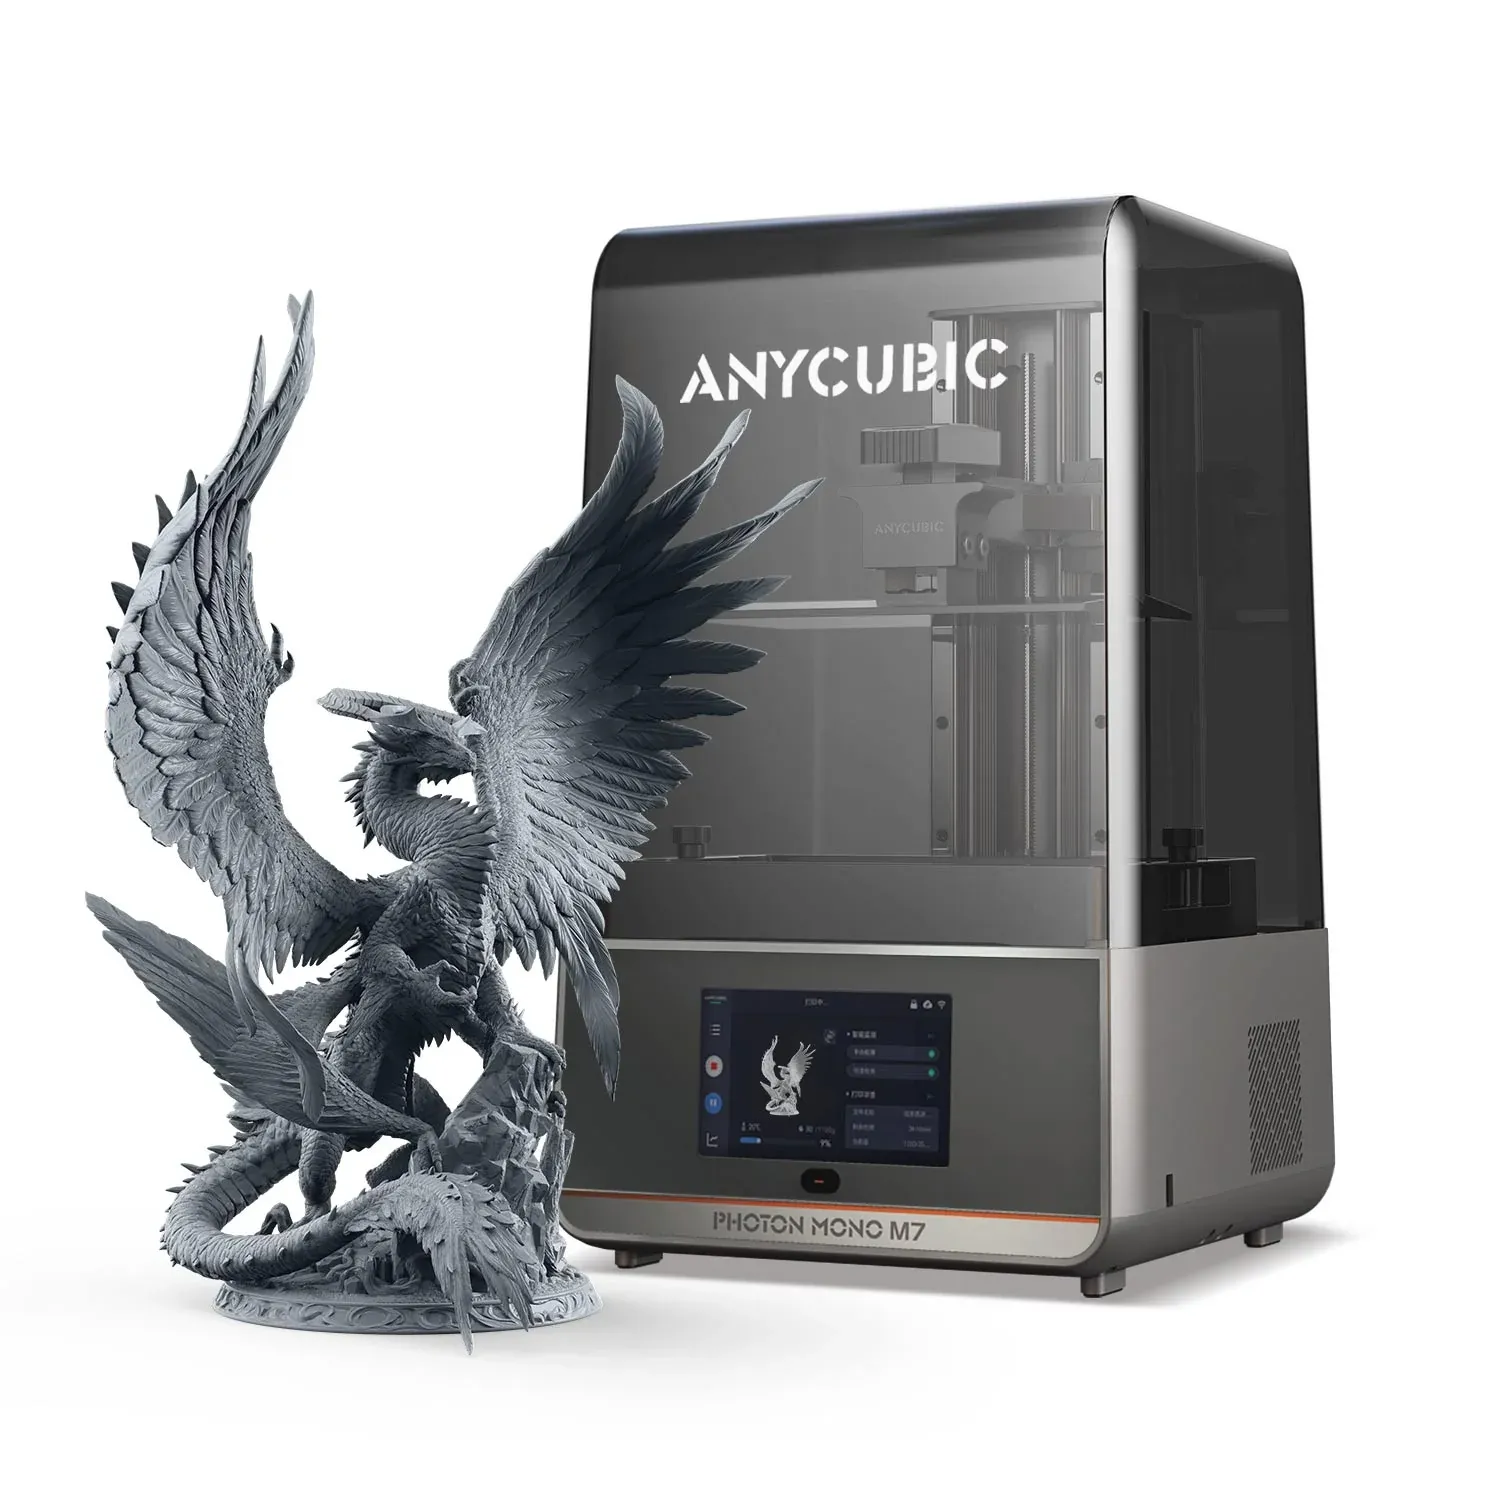
Price: ~$250 to $350 XY Resolution: 19 microns (14K) Build Volume: 170 x 107 x 200mm Light Source: LighTurbo 3.0
The Photon Mono M7 is Anycubic's answer to the Mars 5 Ultra, with a slightly larger build plate and competitive resolution. The 14K screen packed into this form factor produces consistently sharp minis. Anycubic's slicer (Photon Workshop) has improved significantly and now includes good auto-support placement for miniatures.
The slightly larger build plate compared to the Mars 5 Ultra means you can fit 1 to 2 extra minis per print run, which adds up if you are batch printing an army.
Who should buy this: A solid alternative if the Mars 5 Ultra is out of stock or on sale, or if you prefer Anycubic's ecosystem. The print quality difference at miniature scale is marginal compared to the Mars 5 Ultra.
Elegoo Saturn 4 Ultra: Best for Batch Printing and Terrain
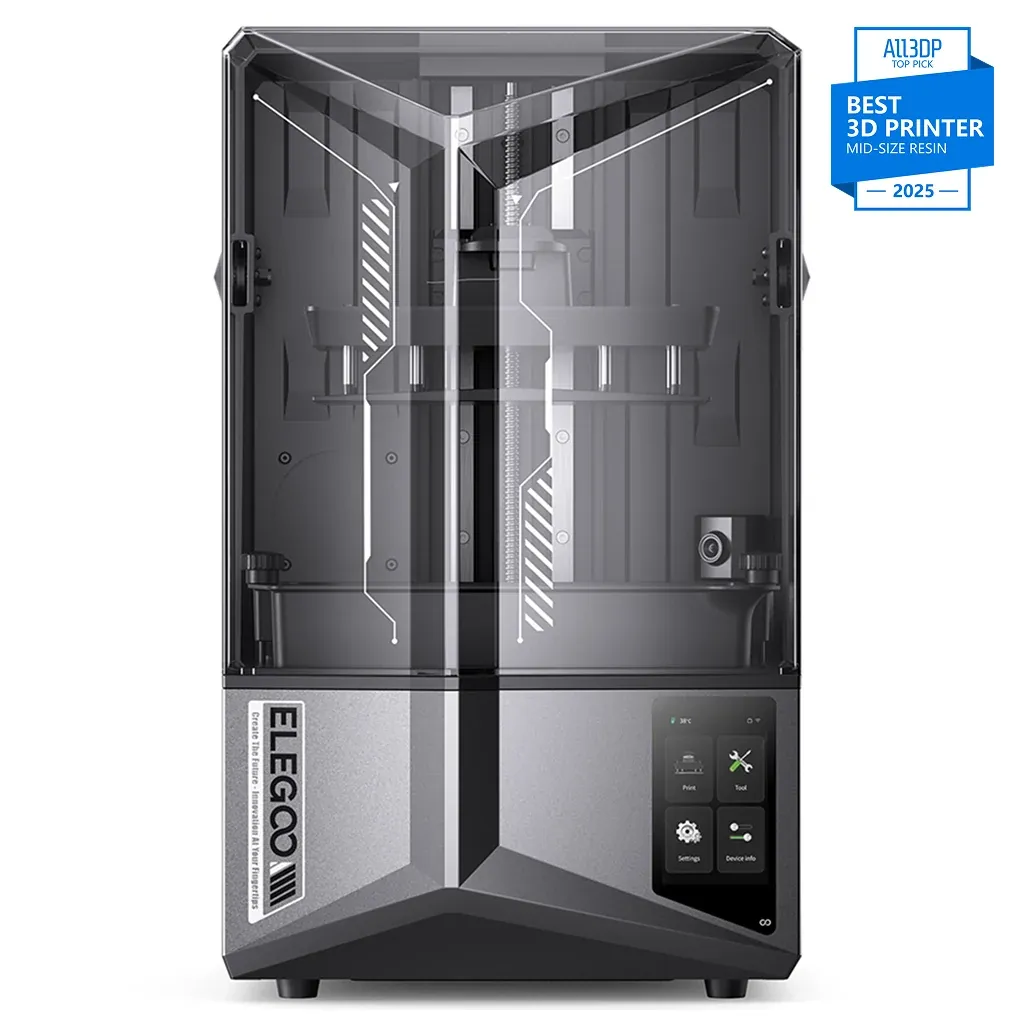
Price: ~$450 to $500 XY Resolution: 19 microns (12K) Build Volume: 218 x 123 x 220mm Light Source: COB LED + Fresnel
If you want to print entire squads in one batch, or if you plan to print dungeon terrain tiles alongside your minis, the Saturn 4 Ultra earns its higher price. The build plate is large enough to fit 15 to 20 standard minis at once, or four 50x50mm terrain tiles, or a mix of both.
This is the best 3d printer for miniatures and terrain because it handles both without compromise. The resolution is slightly lower than the Mars 5 Ultra (19 vs 18 microns) but the difference is undetectable on painted minis. The tilt release mechanism is the same proven design.
Who should buy this: DMs who need terrain and monsters, army painters who want to batch print squads, and anyone who will eventually want a larger build plate. The extra $170 to $200 over the Mars 5 Ultra buys you significantly more printing capacity per run.
Phrozen Sonic Mega 8K: Best Large Format Resin Printer
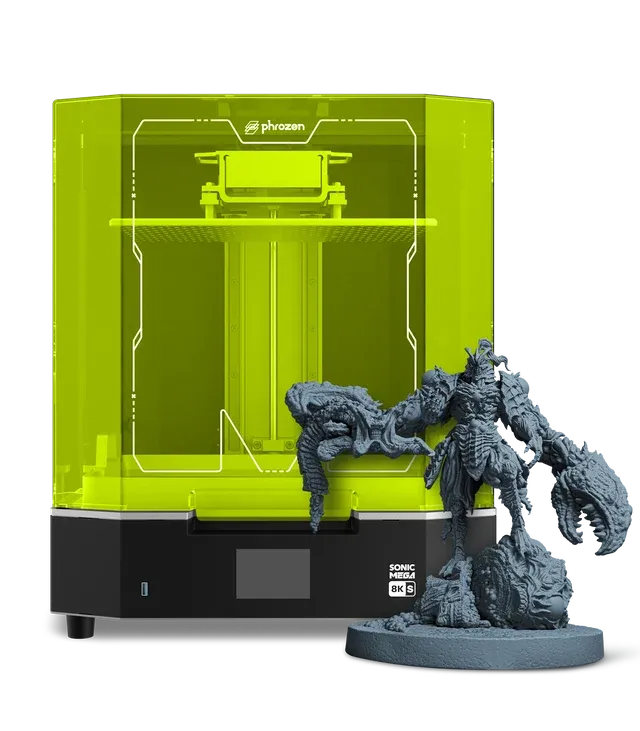
Price: ~$600 to $700 XY Resolution: 43 microns Build Volume: 330 x 185 x 400mm Light Source: ParaLED Matrix 3.0
The Mega 8K is for people printing large display pieces, full terrain sets, or oversized monsters and vehicles. A dragon that would need to be split into 4 parts on a Mars fits on the Mega's plate in one piece. The resolution per pixel is lower (43 microns), but at the scale of objects you are printing on this machine, it still looks excellent.
Who should buy this: Dedicated terrain builders, display piece printers, and anyone who wants to print large models without splitting them. Not necessary for standard 28mm minis, the smaller printers do that job better and faster.
Best FDM Printers for Miniatures (When You Don't Want Resin)
Some people do not want to deal with liquid resin, chemical fumes, and the washing/curing process. That is perfectly valid. Modern FDM printers have gotten remarkably good at small detailed prints, especially with a 0.2mm nozzle and fine layer heights. The detail will never match resin at 28mm scale, but for terrain, larger models (75mm+), and tabletop-distance viewing, FDM produces results that many players are happy with.
For a deeper comparison of the two technologies, see our guide on resin vs filament 3D printers.
Bambu Lab X2D: Best FDM for Miniature Detail and Multi-Color Printing
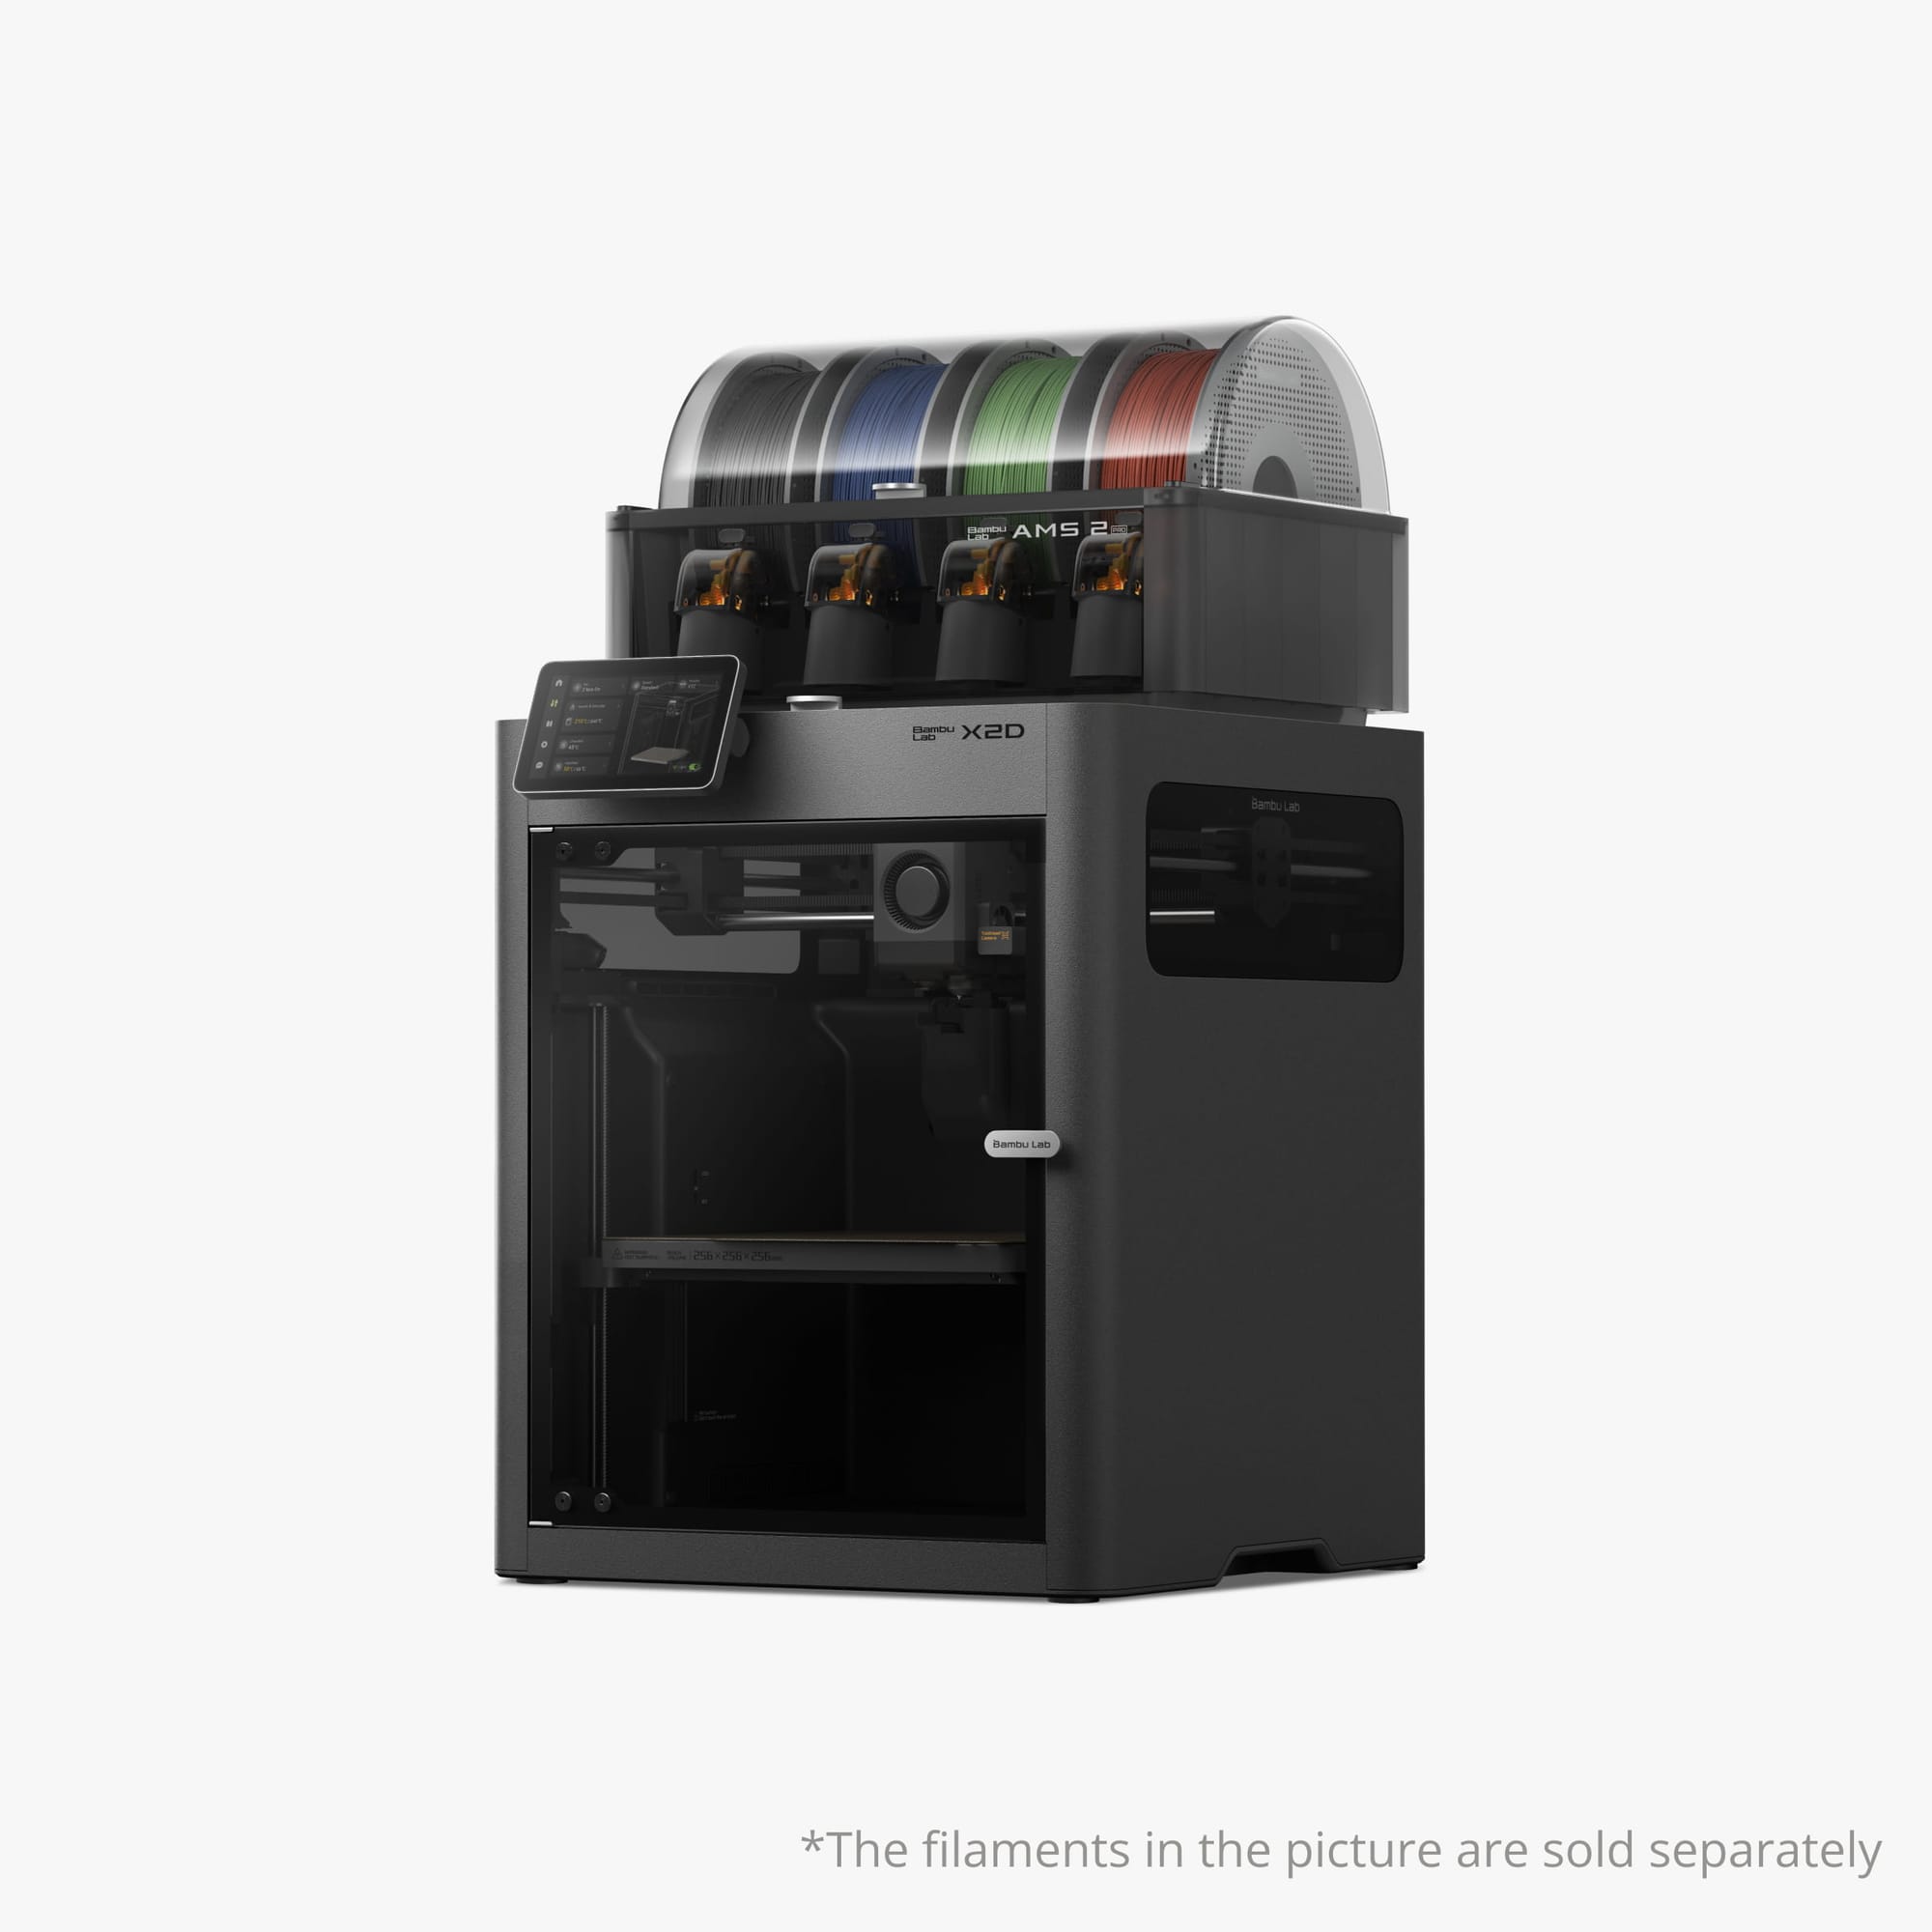
Price: ~$549 Build Volume: 330 x 250 x 340mm Key Feature: Dual extruder, Core XY, enclosed
The X2D is the FDM printer I would pick if I had to print minis without resin. The Core XY motion system delivers the highest positional accuracy in Bambu Lab's consumer lineup, which directly translates to crisper fine details on small prints. Pair it with a 0.2mm nozzle and 0.08mm layer height, and the results on 32mm minis are genuinely impressive for FDM.
The real standout feature for miniature printers is the dual extruder system. You can print minis in two colors without manual filament swaps, saving significant time and effort. Think colored bases and white models ready for painting, or terrain pieces with built-in color accents. Since each extruder handles its own filament independently, there is no purge tower waste like AMS multi-color printing, which means faster prints and less material cost.
The enclosed chamber also helps with layer consistency on long, detailed prints. No drafts means no warping on thin arms and weapons.
Who should buy this: Players who want the convenience of FDM (no chemicals, no post-processing), need multi-color capability for terrain or pre-colored bases, and are willing to accept "very good for FDM" detail rather than resin-level perfection.
Bambu Lab A1 Mini: Best Budget FDM for Minis
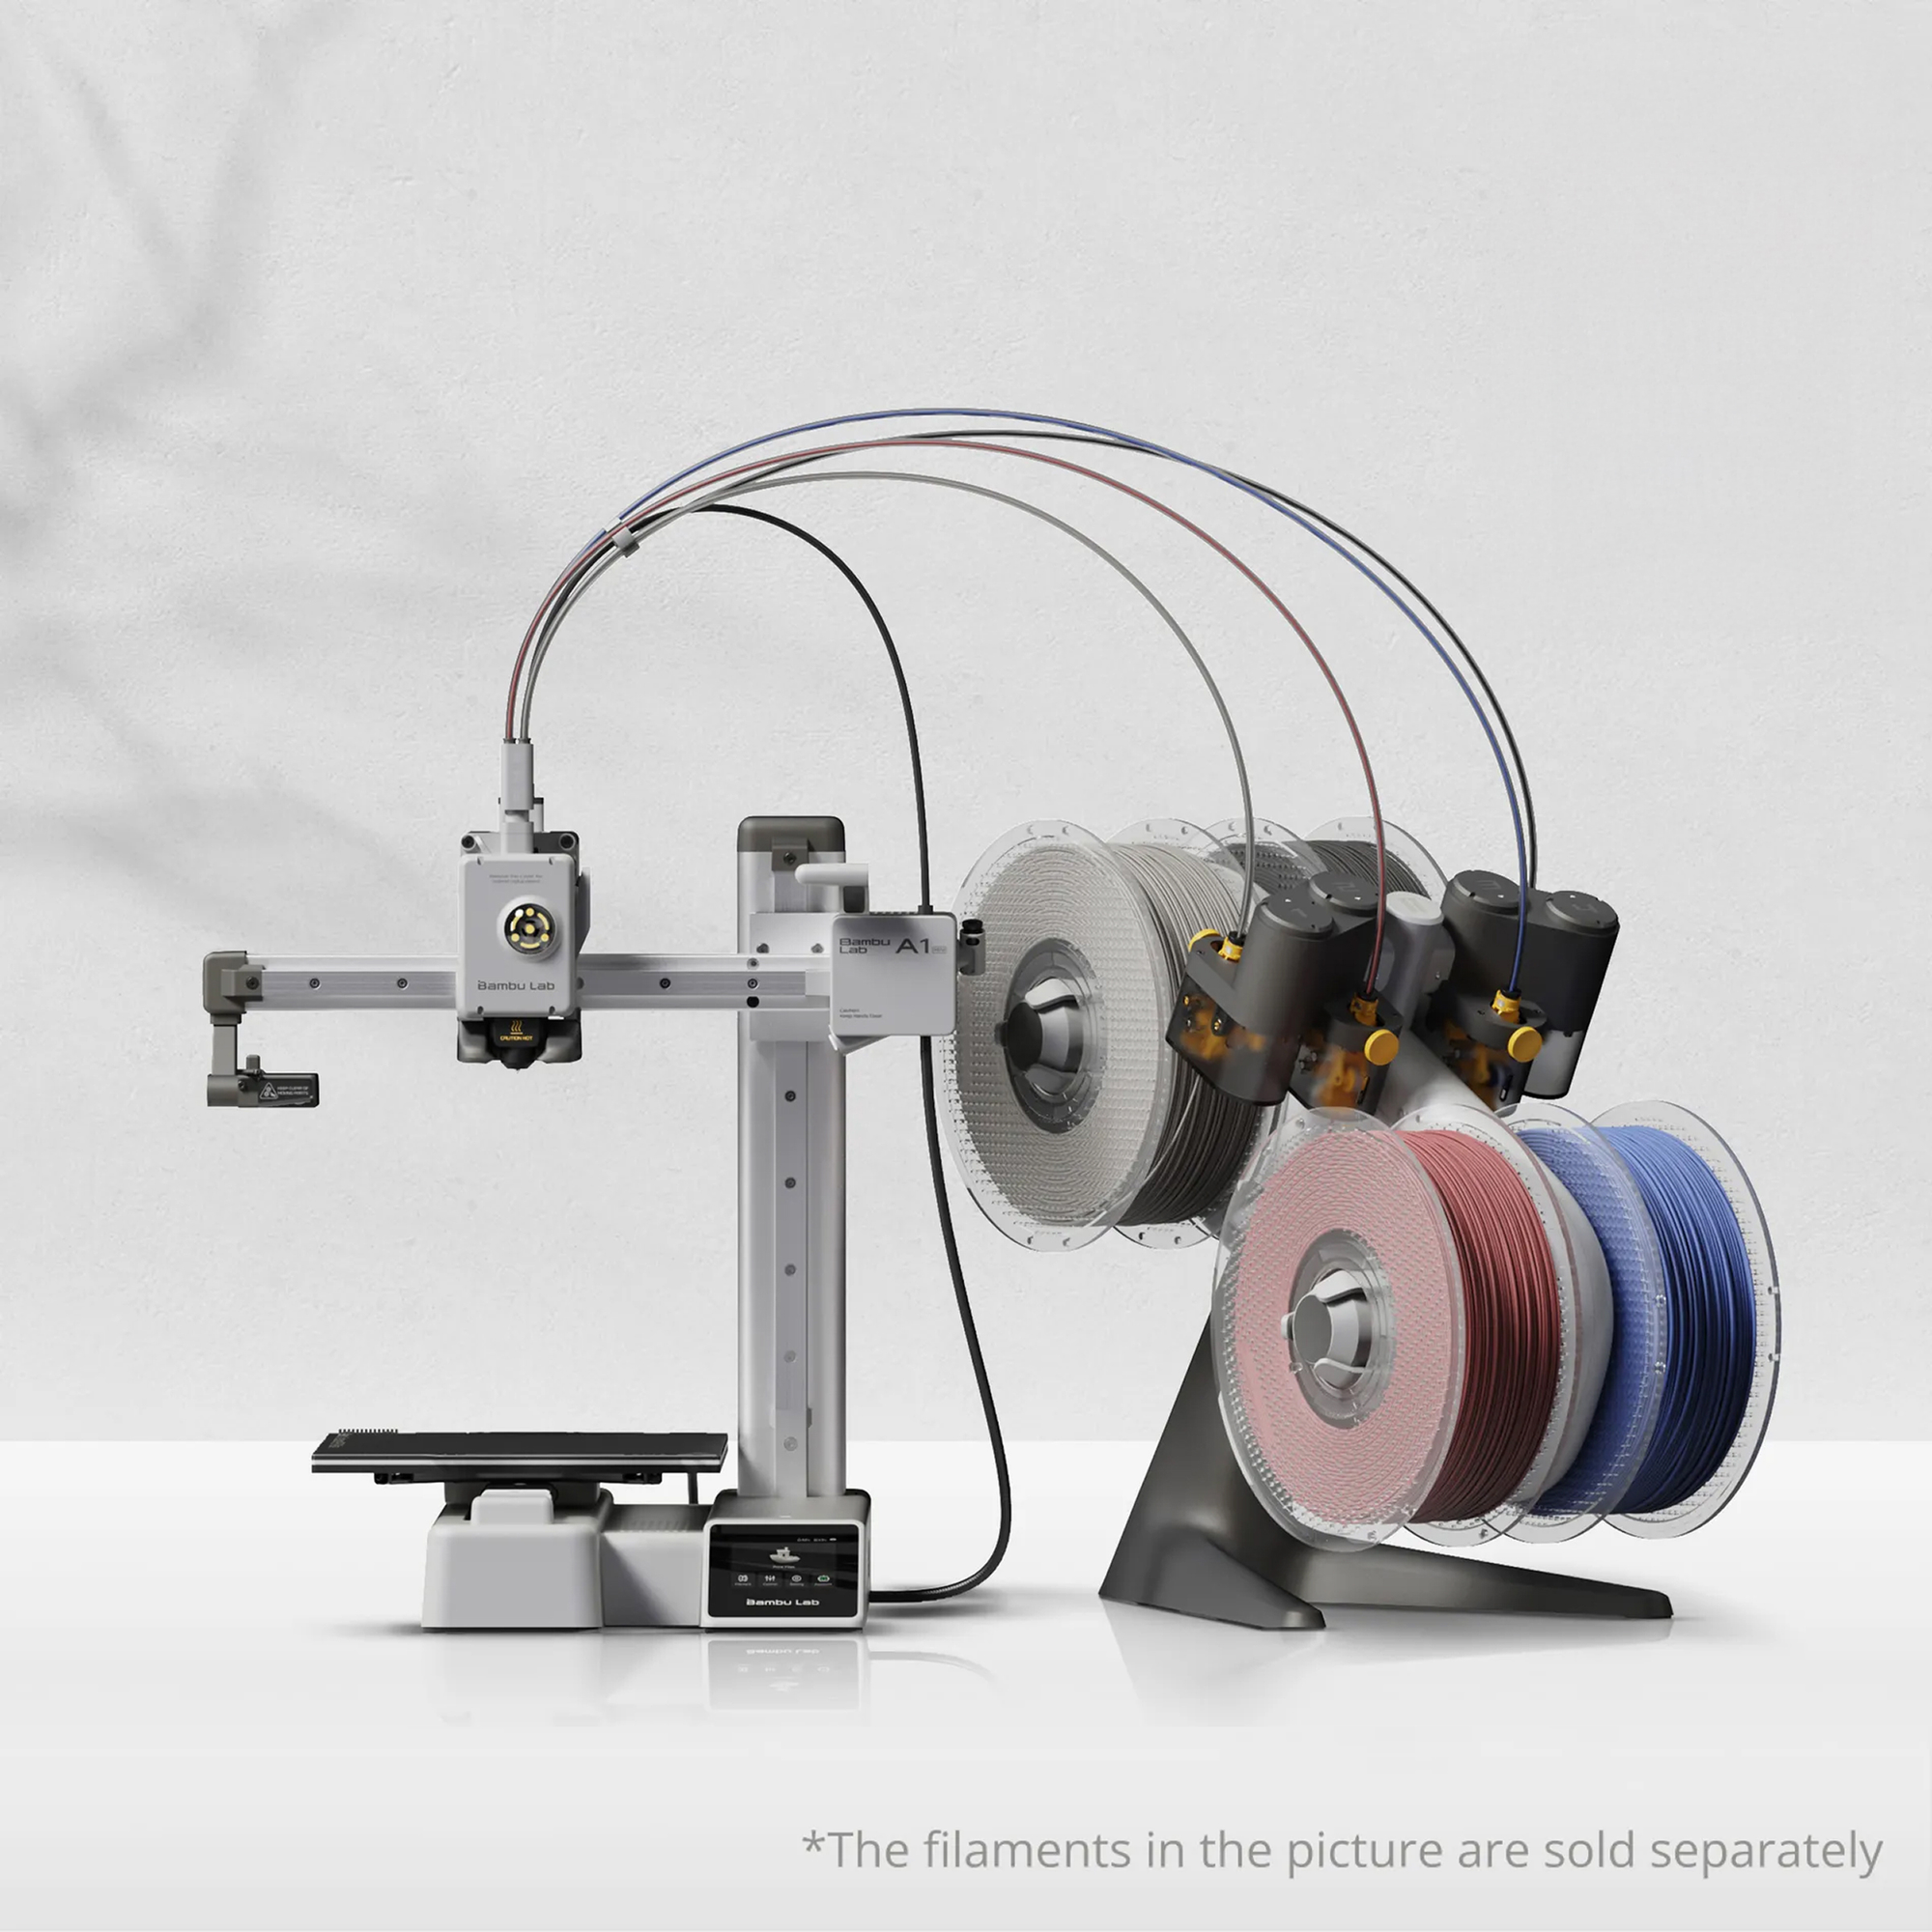
Price: ~$200 to $300 Build Volume: 180 x 180 x 180mm Key Feature: Fast, beginner-friendly, AMS Lite compatible
The A1 Mini is the easiest path into FDM miniature printing. Swap the stock 0.4mm nozzle for a 0.2mm nozzle (takes 30 seconds on Bambu printers), set the layer height to 0.08mm, and you will get surprisingly decent minis for the price. The auto-calibration and fast printing make the workflow painless.
The build volume is plenty for miniatures. You can fit a full party of 6 to 8 minis on the plate simultaneously.
With the AMS Lite add-on, you can print in up to 4 colors, though multi-color FDM at mini scale is challenging and works best for larger terrain pieces rather than tiny character details.
Who should buy this: Budget-conscious players who want one printer for both minis and general purpose printing. Also a great choice for kids getting into the hobby, since there are no toxic chemicals involved.
Bambu Lab A1: Best for Terrain and Large Battlefields
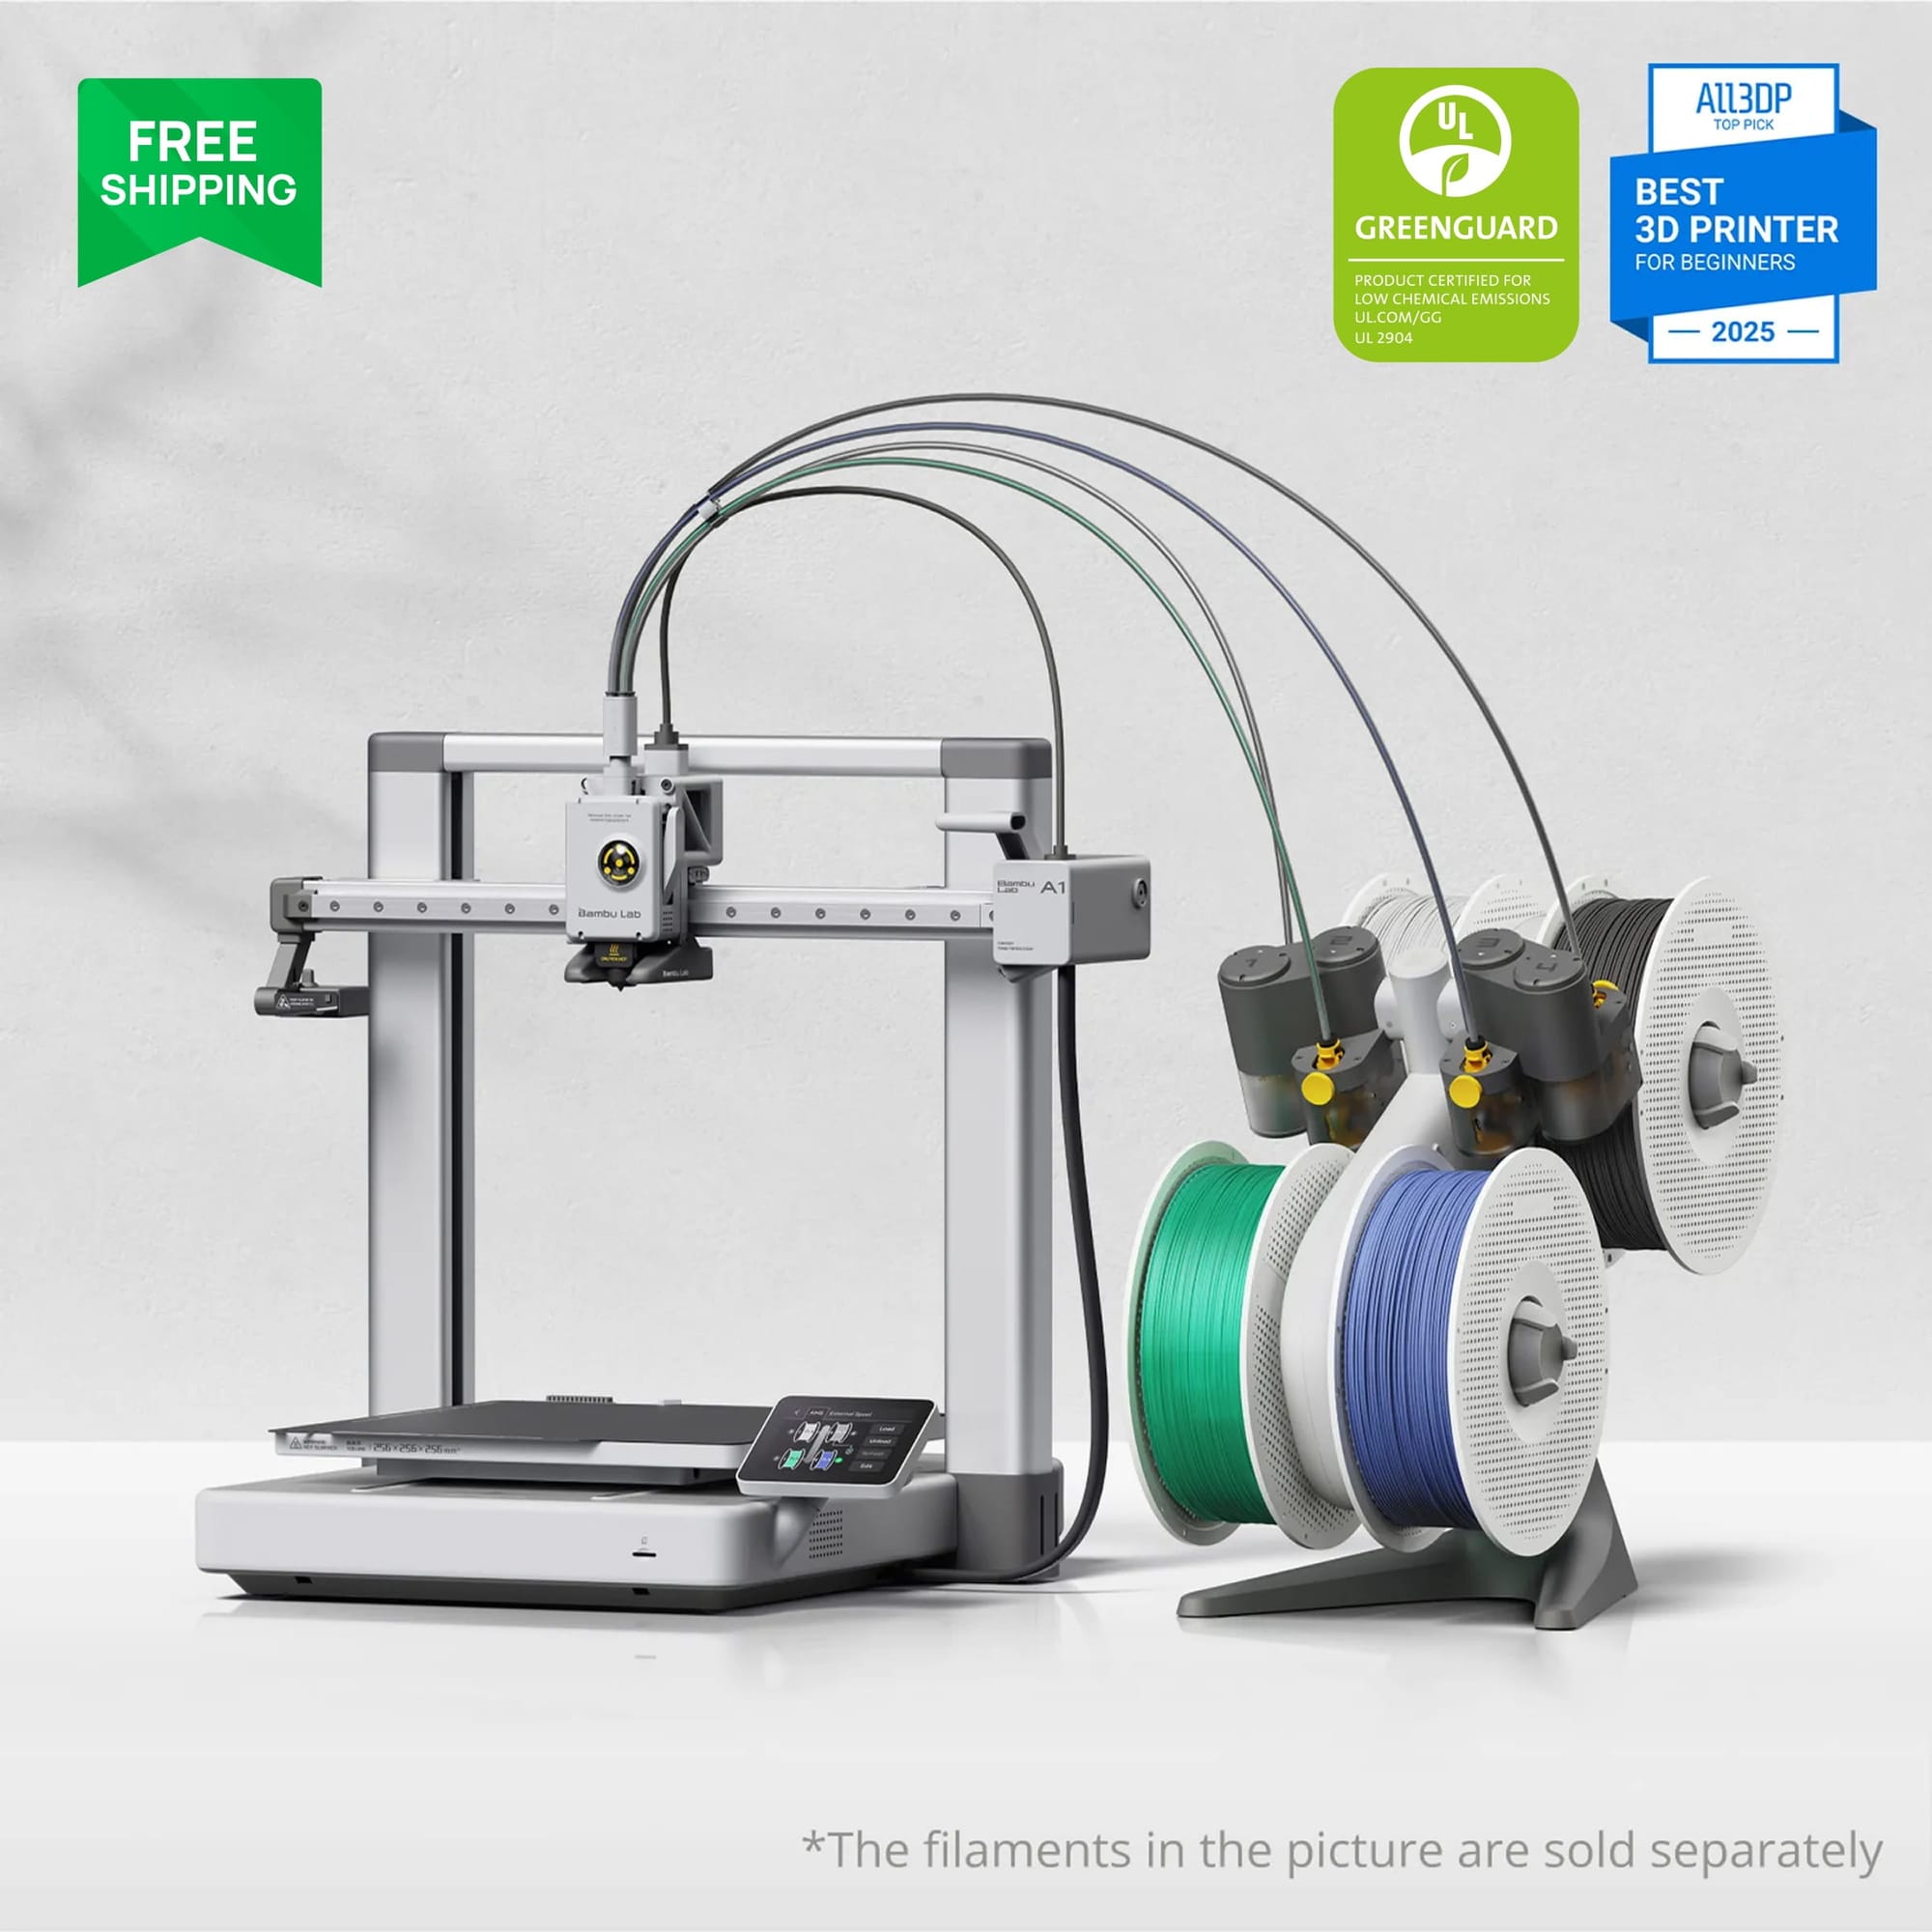
Price: ~$340 to $400 Build Volume: 256 x 256 x 256mm Key Feature: Large volume, fast, AMS compatible
If your main goal is 3D printed tabletop terrain (dungeon tiles, walls, forests, buildings, scatter terrain), the A1 is the right pick. The 256mm build volume lets you print large terrain sections in one piece, and the speed means a set of dungeon tiles that takes 20+ hours on an older printer finishes in 6 to 8 hours.
For minis themselves, the A1 performs the same as the A1 Mini when using a 0.2mm nozzle, it is the same print technology just on a bigger platform.
Who should buy this: DMs and terrain builders who want to create entire battlefields. Pair it with a resin printer for minis and you have the complete tabletop production setup.
How to Choose: What to Look for in a 3D Printer for Minis
If none of the specific recommendations above match your situation, here is how to evaluate any printer for miniature printing.
XY resolution matters most. This is the detail sharpness in the horizontal plane, measured in microns. For 28mm minis, aim for 20 microns or less on resin printers. The lower the number, the finer the detail. Z resolution (layer height) matters less because you will be printing at 0.03 to 0.05mm layers regardless of the printer.
Build volume determines batch size. A good 3d printer for miniatures does not need to be large. Most 28mm minis fit within a 50 x 30 x 40mm bounding box. A 130 x 80mm build plate fits 6 to 10 minis per run. Only go larger if you need terrain or want to batch print squads.
Light source quality affects consistency. COB LED with Fresnel lens (used in Elegoo Mars 5 Ultra and Saturn 4 Ultra) provides more even illumination than bare LED arrays. This means consistent detail quality from the center to the edges of the build plate.
Tilt or peel mechanism affects success rate. Printers with tilt release (Mars 5 Ultra, Saturn 4 Ultra) put less stress on delicate prints during the peel step between layers. This reduces failures on minis with thin swords, staffs, and antenna.
Ecosystem and community. A printer with an active community means better support placement guides, validated resin profiles, and troubleshooting help. Elegoo and Anycubic have the largest miniature-printing communities on Reddit and Discord.
Is It Worth Buying a 3D Printer for Miniatures?
Let me lay out the real numbers so you can decide for yourself. This is something I wish someone had told me before I bought my first 3D printer for minis.
The Upfront Investment
| Item | Cost | Notes |
|---|---|---|
| Resin printer (Mars 5 Ultra) | $280 | One-time purchase |
| Wash and cure station | $70 to $100 | Mercury Plus or equivalent |
| Resin (1L to start) | $25 to $35 | Prints 80 to 120 minis per liter |
| Safety gear (gloves, mask, glasses) | $20 to $30 | Replaceable consumables |
| Isopropyl alcohol (2L) | $15 to $20 | For washing prints |
| Total startup cost | $410 to $465 |
Cost Per Miniature: Print vs Buy
| Scenario | Buy Retail | 3D Print |
|---|---|---|
| 1 hero mini (28mm) | $8 to $15 (individual) | ~$0.25 to $0.40 |
| 10 infantry squad | $50 to $60 (box set) | ~$2.50 to $4.00 |
| 50 mixed army | $250 to $350 | ~$12 to $20 |
| 100 minis (full collection) | $500 to $700+ | ~$25 to $40 |
| 200 minis (serious hobbyist) | $1,000 to $1,400+ | ~$50 to $80 |
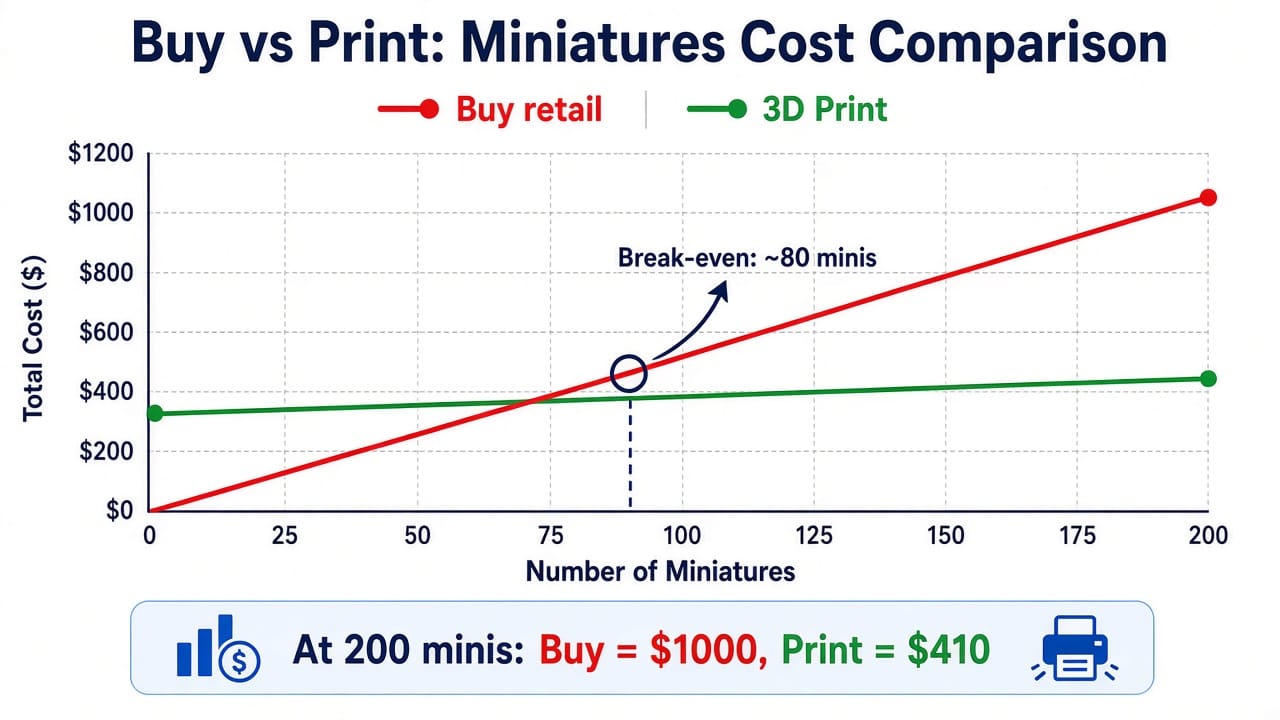
The break-even point is roughly 80 to 100 miniatures. Below that, buying retail is cheaper when you factor in the printer and setup costs. Above that, every additional mini is essentially free compared to retail prices. If you paint regularly and play multiple game systems, you will cross that threshold within the first year.
For a deeper dive into 3D printing costs across all types of projects, see our full 3D printing cost breakdown.
What the Numbers Don't Show
The cost comparison above only covers material. There are factors that numbers cannot capture:
Time investment. Each print run takes 2 to 5 hours, plus 30 to 60 minutes of washing, curing, and support removal. Buying retail minis is faster per unit (open box, clip from sprue, glue, done). Printing pays off in volume but each individual mini takes more of your time.
Customization. This is where printing becomes priceless. You cannot buy a mini that matches your exact D&D character with the right weapon, pose, and armor. With 3D printing, you can find or commission exactly what you imagine. That creative freedom has no retail equivalent.
The satisfaction factor. There is a specific kind of joy in placing a mini on the table and saying "I printed that." It is the same feeling people get from painting, just extended to the manufacturing step. If that matters to you, the investment is worth it regardless of the math.
From Printer to Tabletop: The Complete Beginner Workflow
This section covers everything that happens after you unbox the printer. Most buying guides stop at the purchase, but the real learning curve starts here.
Step 1: Find and Download Miniature STL Files
You need 3D printable miniatures files before you can print anything. Here are the best sources:
Subscription services (best value for regular printers):
- Loot Studios ($15/month): High-quality thematic packs of 15 to 20 models per month. D&D and fantasy focused. Excellent sculpt quality.
- Titan Forge ($10 to $15/month): Wargaming-oriented, good for Warhammer-scale minis.
- One Page Rules ($10/month): Full wargaming systems with matching miniatures. Great if you want rules and minis together.
Pay-per-model:
- MyMiniFactory (varies): The largest marketplace for tabletop miniature STLs. Individual models cost $2 to $8. Search for any creature type, class, or faction.
- Cults3D (varies): Similar marketplace with a wide selection.
Free options:
- MakerWorld (free): Growing library of free miniature files, especially good for terrain and accessories.
- Printables (free): Large free library, quality varies but many excellent community designs.
- Thingiverse (free): Massive historical library. Search "tabletop miniature" or "28mm" for relevant results.
A note on Warhammer: Games Workshop aggressively protects its IP. You will not find official Warhammer STL files for download. What you will find are "proxy" or "counts-as" models from independent sculptors that are designed to be visually similar but legally distinct. These are fine for casual and tournament play in most groups.
Step 2: Slice and Prepare for Printing
Import your STL into a resin slicer. The two most popular options are:
Lychee Slicer (free tier available): My recommendation for beginners. The auto-support feature is good, the interface is clean, and it exports to all major resin printers.
Chitubox (free tier available): Slightly older but very widely used. Compatible with essentially every resin printer.
Key slicer settings for miniatures:
- Layer height: 0.03 to 0.05mm (0.05mm is the best balance of speed and quality for gaming minis)
- Exposure time: Follow your resin manufacturer's recommended settings for your specific printer
- Supports: Use light or medium supports. Heavy supports leave marks that need more cleanup. Place supports on the back of the model when possible so marks face away from the viewer.
- Orientation: Tilt the model 15 to 30 degrees to reduce suction forces and improve detail on the face (which should face away from the build plate)
- Hollowing: Optional for 28mm minis (saves minimal resin at this size). Recommended for larger models (50mm+) to save material and reduce cure-through artifacts.
Step 3: Print
Fill the resin vat, shake the bottle well before pouring, start the print, and wait. A single 28mm mini takes 1.5 to 3 hours depending on height and layer thickness. A full plate of 8 to 10 minis takes 3 to 5 hours because resin prints cure entire layers at once, so more minis on the plate do not significantly increase print time.
Step 4: Wash, Cure, and Remove Supports
This is the step that separates resin printing from FDM. It is not difficult, but it requires specific equipment and attention to safety.
Washing: Remove the build plate and submerge printed minis in isopropyl alcohol (IPA) 95%+ for 2 to 3 minutes. A wash station (like the Elegoo Mercury Plus) automates this with a spinning basket. Gently brush any residual resin from crevices with a soft brush. Wear nitrile gloves during this entire process.
Drying: Let minis air dry for 10 to 15 minutes or use a soft cloth. All IPA must evaporate before curing.
Curing: Expose minis to UV light for 3 to 8 minutes per side in a curing station. Under-curing leaves the surface tacky. Over-curing makes the resin brittle. Follow your resin manufacturer's curing recommendations.
Support removal: Using flush cutters, clip each support as close to the model surface as possible. Small nubs can be sanded with 400 to 600 grit sandpaper or carefully scraped with a hobby knife. This is the most tedious step, but it gets faster with practice. With good support placement in the slicer, cleanup takes 5 to 10 minutes per mini.
For more on supports and how to place them to minimize cleanup, check our dedicated guide.
Step 5: Prime and Paint
Once cleaned and cured, resin minis are ready for primer. Unlike bare plastic from injection molded kits, resin minis hold primer and paint exceptionally well.
Priming: Use a matte spray primer (grey is the most versatile color). Citadel, Vallejo, and Army Painter all make primers designed for miniatures. Two thin coats from 15 to 20cm distance. Let each coat dry for 30 minutes.
Painting: This is an entire hobby on its own, but the basics are: base coat each area, add a wash (thin dark paint that settles in recesses), then drybrush highlights. Acrylic miniature paints from Citadel, Vallejo, or Army Painter are the standard. A starter paint set costs $25 to $40 and covers most color needs.
A full 3D printer Warhammer workflow from file download to painted model on the table takes roughly: 30 minutes to find and slice the STL, 3 hours to print, 30 minutes to wash/cure/clean, and 1 to 3 hours to paint. The printing is hands-off time, so the active effort is about 2 to 4 hours per mini, roughly the same as assembling and painting a retail kit.
Resin Safety: Setting Up a Safe Printing Space
I want to spend some time on this because most reviews mention "resin is toxic" in one sentence and move on. The reality is that resin printing is perfectly safe if you take a few basic precautions, but those precautions are not optional.
Liquid resin is a skin sensitizer. Repeated skin contact can cause allergic reactions that get worse over time. Some people develop permanent sensitivity after just a few exposures without gloves. This is the number one risk and the easiest to prevent.
Essential safety setup:
| Item | Purpose | Cost |
|---|---|---|
| Nitrile gloves (box of 100) | Prevent skin contact with liquid resin | $8 to $12 |
| Safety glasses | Protect eyes from splashes | $5 to $10 |
| N95 or activated carbon mask | Filter resin fumes during printing | $10 to $15 |
| Ventilation (window fan or exhaust) | Remove fumes from printing area | $15 to $30 |
| Paper towels + trash bags | Clean spills and dispose of contaminated materials | $5 |
| UV flashlight or sunlight | Cure resin waste before disposal | $5 to $10 |
Ventilation options ranked by effectiveness:
- Best: Print in a garage or workshop with an open window or door
- Good: Print near an open window with a small fan blowing air outward
- Acceptable: Print in a well-ventilated room with the door open and cross-breeze
- Not acceptable: Closed room with no air circulation
Waste disposal: Never pour liquid resin down the drain. Cure waste resin by exposing it to UV light (sunlight works) until it hardens, then dispose of it as solid waste. IPA contaminated with resin should be left in a shallow tray in sunlight until the resin cures out of solution, then the IPA can be reused or evaporated.
Pets and children: Keep the printing area inaccessible to both. Cats are particularly attracted to the warmth of the printer and the shiny surface of the resin vat. A closed door is the simplest solution.
For a complete guide on fume risks for all types of 3D printing materials, see our article on 3D printing safety and toxicity.
My Miniature Printing Setup and What I Would Change
I started with an Elegoo Mars 3 two years ago and upgraded to the Mars 5 Ultra about eight months ago. The difference in detail and reliability between the two generations is significant. If you are buying today, do not bother with older models just to save $30 to $50.
My current workflow: I batch slice 6 to 8 minis in Lychee Slicer on Sunday evening, start the print before bed, and wake up to a finished plate. Monday evening I wash, cure, and remove supports while watching something on my phone. Tuesday and Wednesday I prime and paint in short sessions. By game night on Friday, the minis are table-ready.
The thing I would change if starting over: I would buy the wash and cure station from day one instead of trying to save money with a plastic container and a UV nail lamp. The dedicated station is faster, cleaner, and pays for itself in convenience within the first month.
I would also buy more resin upfront. Running out mid-print is frustrating, and resin has a long shelf life if stored properly (cool, dark, sealed). Buying 2 to 3 liters at once usually gets a volume discount and means you always have supply on hand.
FAQ
What kind of 3D printer is best for miniatures?
A resin printer (LCD/MSLA) is the best 3d printer for miniatures by a wide margin. Resin printers produce XY resolution of 18 to 22 microns, capturing details like chainmail links, facial features, and tiny weapon engravings at 28mm scale. FDM printers, even with a 0.2mm nozzle at 0.08mm layer height, cannot match this level of detail because the minimum feature size is limited by the nozzle diameter. For most tabletop gamers, the Elegoo Mars 5 Ultra ($280) is the best overall choice. If you specifically do not want resin, the Bambu Lab X2D ($549) is the best FDM option, offering Core XY precision and dual extruders for multi-color terrain and bases.
Is it worth buying a 3D printer for miniatures?
Yes, if you paint more than about 80 miniatures over the printer's lifetime. The upfront investment is roughly $410 to $465 (printer, wash/cure station, resin, safety gear). After that, each miniature costs approximately $0.25 to $0.40 in resin, compared to $5 to $15 per mini at retail. The break-even point is around 80 to 100 minis. Beyond cost savings, the ability to print custom characters, out-of-production models, and exact poses for your RPG characters adds value that is hard to put a price on. If you play one tabletop game casually (buying 2 to 3 boxes per year), the savings are modest. If you play multiple systems or paint as a hobby, the printer pays for itself quickly.
How much does a 3D printer for miniatures cost?
The printer itself costs $170 to $700 depending on model and build volume. A good entry-level resin printer (Elegoo Mars 4) costs about $170. The best overall choice (Mars 5 Ultra) costs about $280. A large-format resin printer for batch printing and terrain (Saturn 4 Ultra) costs about $450. On top of the printer, budget $130 to $185 for a wash/cure station ($70 to $100), your first liter of resin ($25 to $35), and safety equipment ($20 to $30). Total first-time setup ranges from $300 to $700, with $410 to $465 being the most common range for a solid beginner setup.
Is it illegal to print Warhammer minis?
Printing miniatures for personal use is legal. Games Workshop does not sell STL files, and their specific sculpts are protected by copyright, but independent sculptors create "proxy" or "counts-as" models that are visually compatible without copying GW's exact designs. These proxy models are legal to print, own, and use in games. Selling printed copies of copyrighted GW sculpts would be illegal. Using proxy minis in official GW tournaments may or may not be allowed depending on the event's rules, but for casual and local play, proxies are widely accepted. The tabletop community generally draws the line at: print what you want for your own table, do not sell copies of someone else's copyrighted work.